• Skip to main content
  • Skip to header left navigation
  • Skip to header right navigation
  • Skip to site footer
  • Home
    • Adventures
    • Places
    • Prophets
    • Apparatus
    • Sustainability
  • Explore
    • Your next adventure
    • Your guides
endorfeen

endorfeen

The Media For Sustainable Outdoors.

  • About us
  • Write/ share
  • endorfeen – instagram page
  • enforfeen Facebook page
  • endorfeen twitter page
  • Pinterest

Archives for April 2023

Adventuring in the Arrochar Alps

April 18, 2023 by Furqan Javed

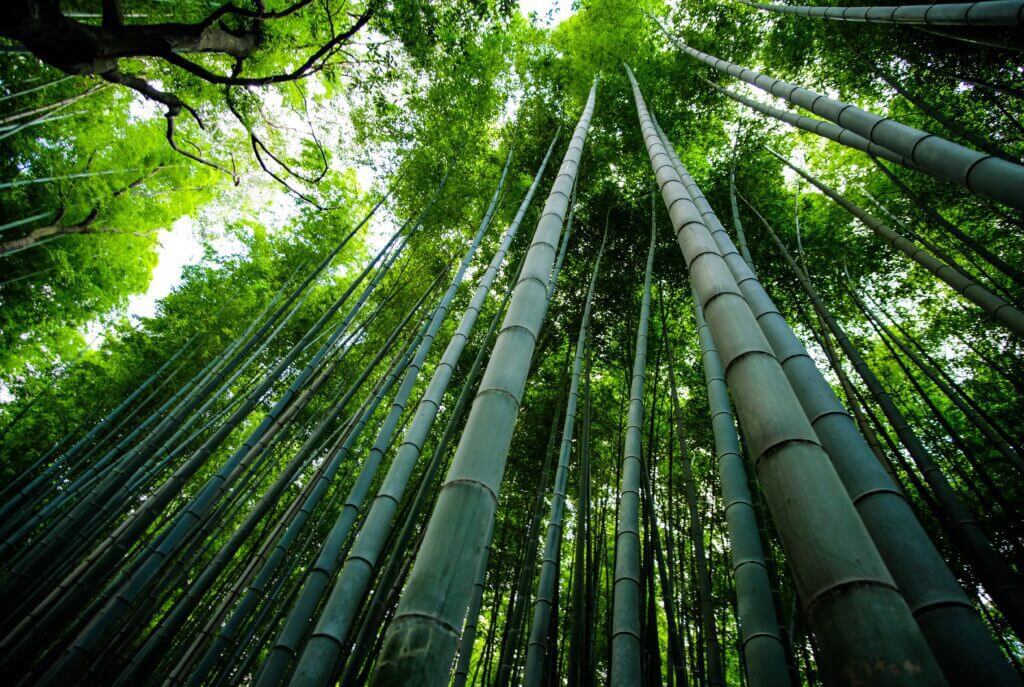
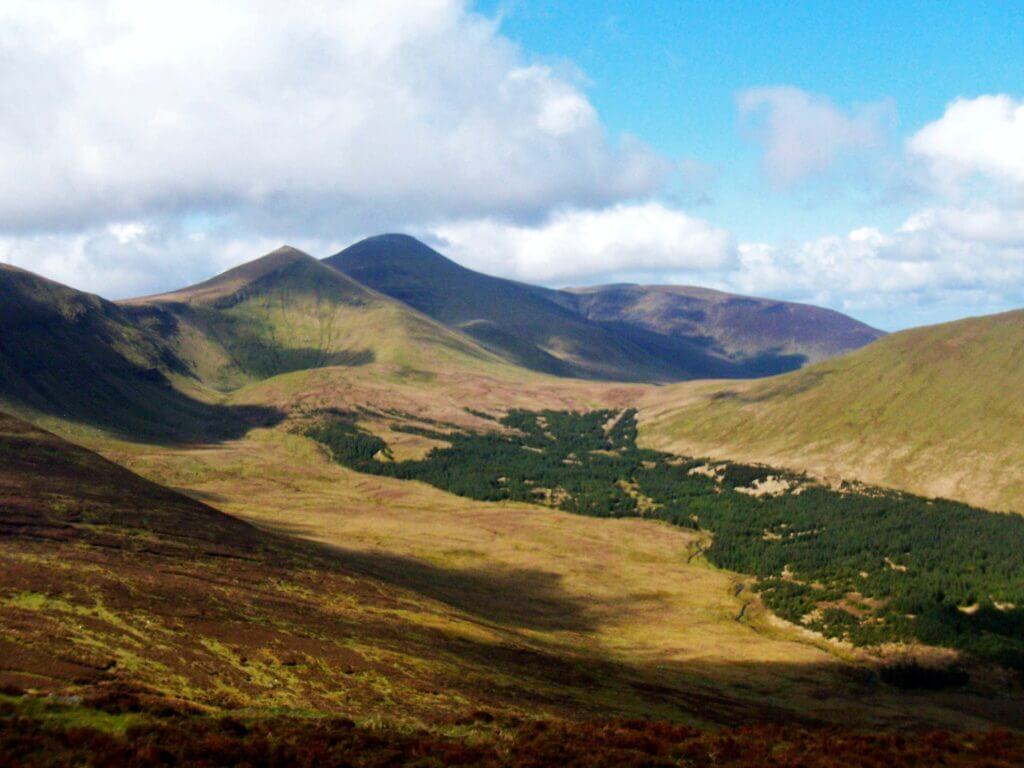
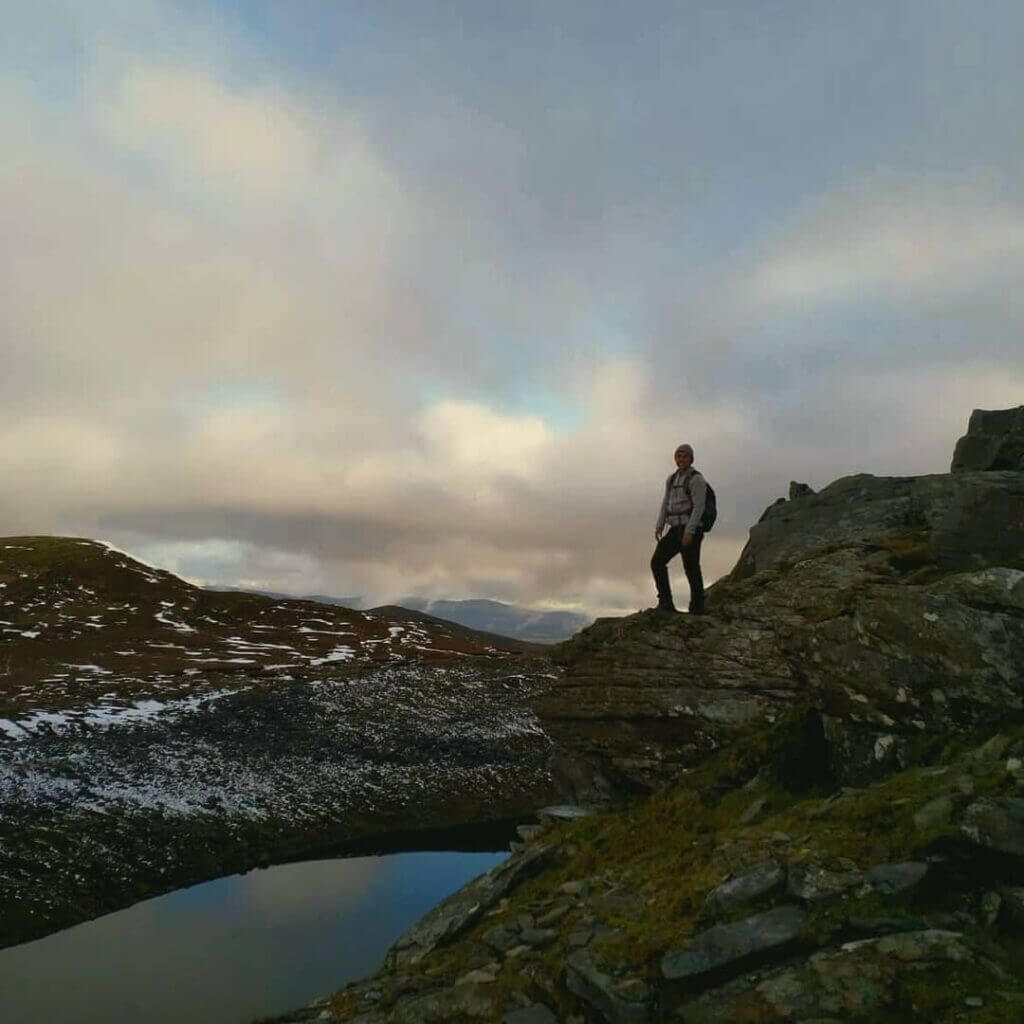
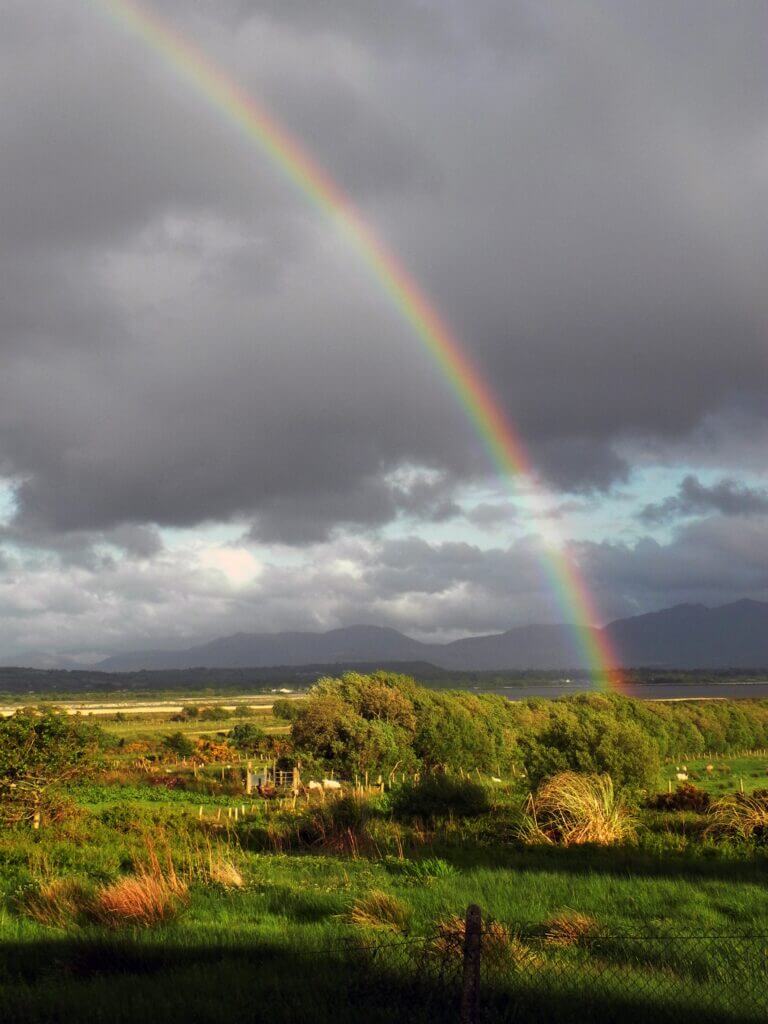
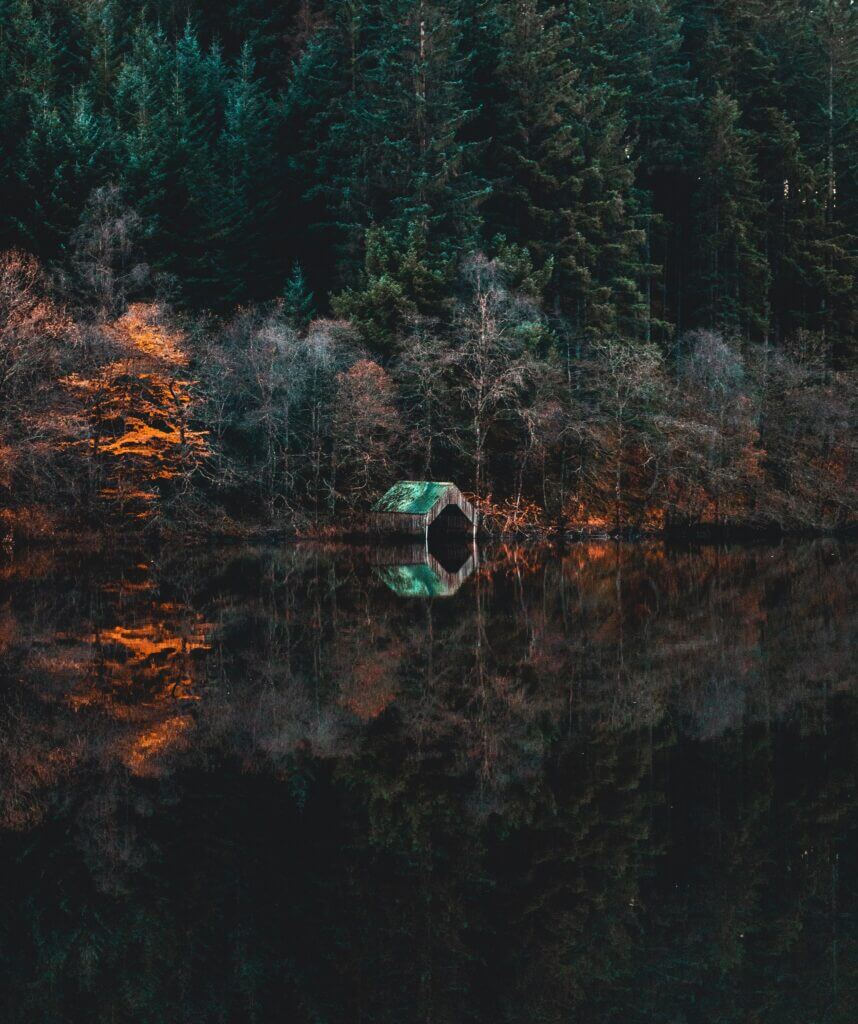
Venture into the rugged, rocky terrain of the Arrochar Alps. Visit a majestic mountain range on the western side of Loch Lomond. With Ben Lomond towering over the eastern shores, it’s no wonder these peaks are a popular destination for outdoor enthusiasts. History has seen many hillwalkers conquer these trails, and it’s not hard to see why. The mountains offer a true alpine experience and are easily accessible from Glasgow and the central belt.

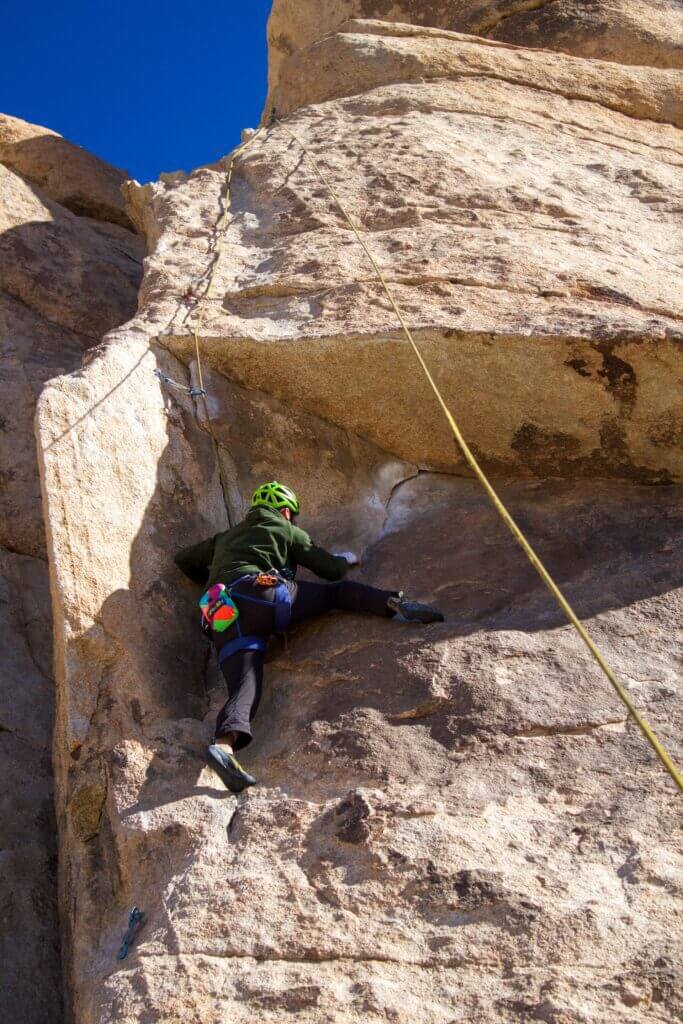
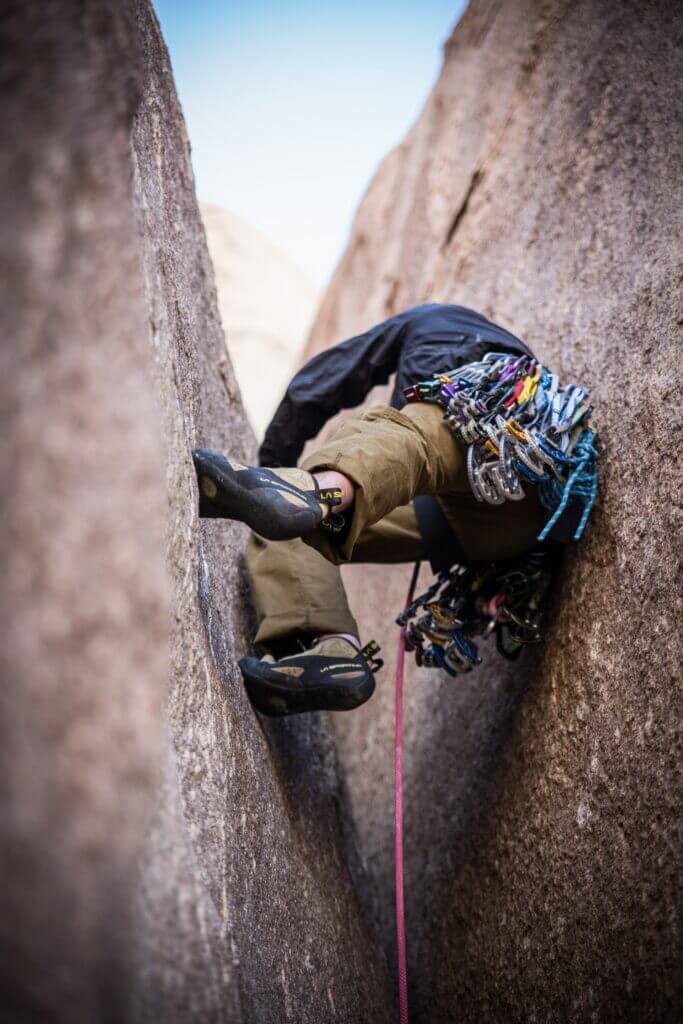
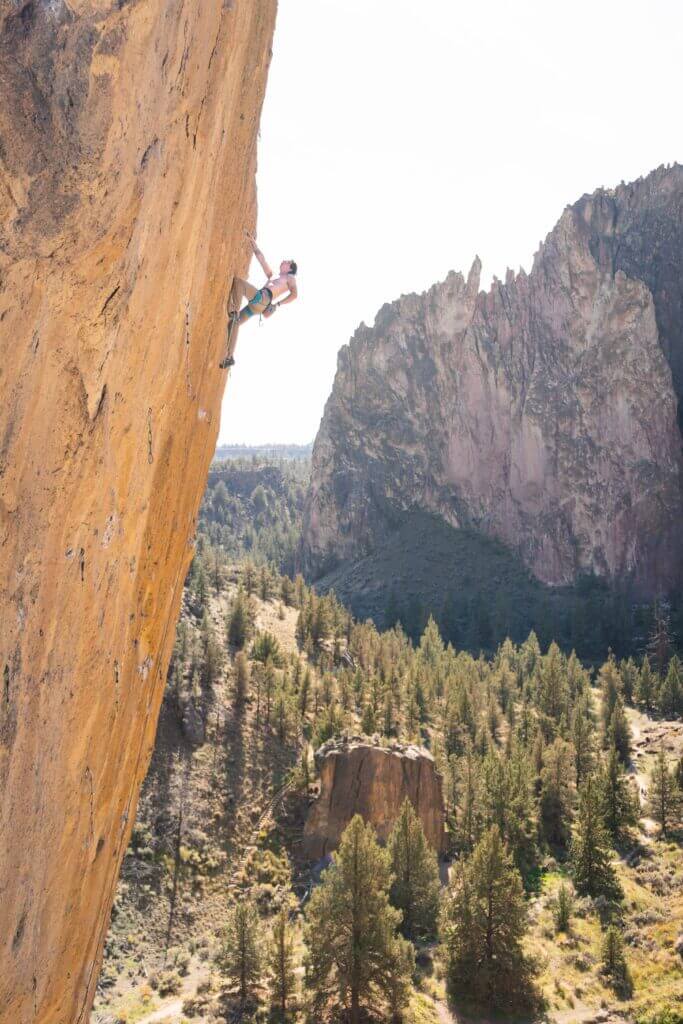
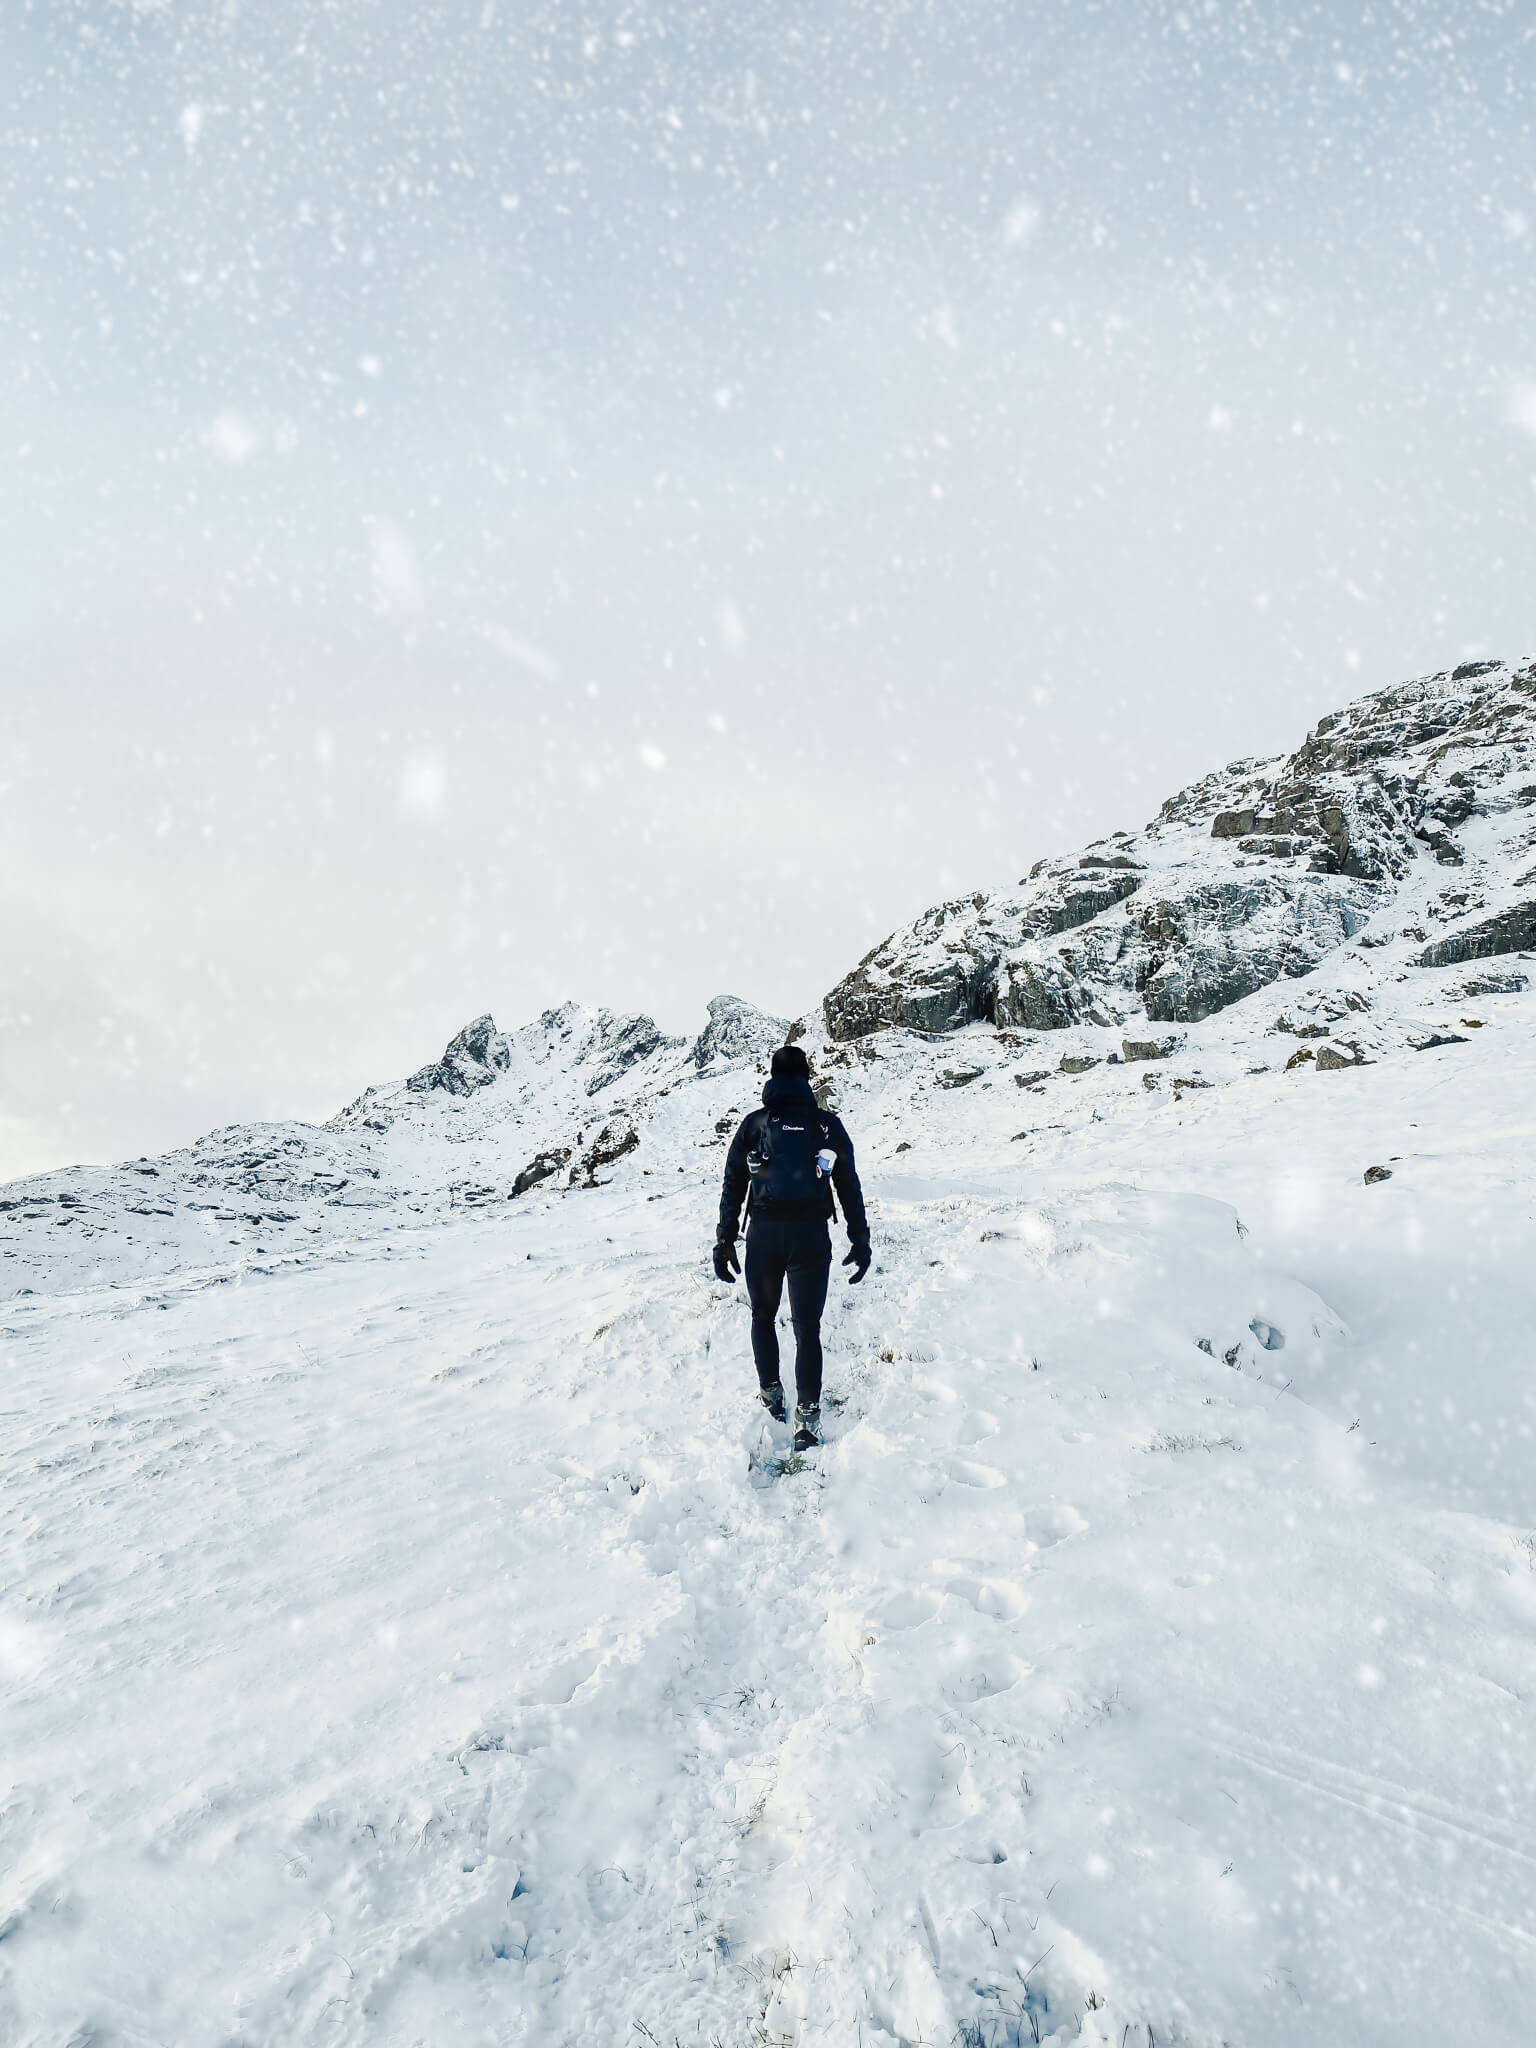
The Arrochar Alps is a must-visit for adrenaline junkies, with the famous Cobbler peak testing even the most experienced climbers. This peak leaves visitors with memories that will last a lifetime.

Arrochar Alps is part of Loch Lomond and the Trossachs National Park, Scotland’s first national park established in 2002.

Pack your gear, lace up your boots, and embark on an adventure of discovery in the majestic Arrochar Alps. Let’s explore together and create unforgettable memories along the way.

Credits: Ian Cylkowski

Discover the Wild & Majestic Arrochar Alps

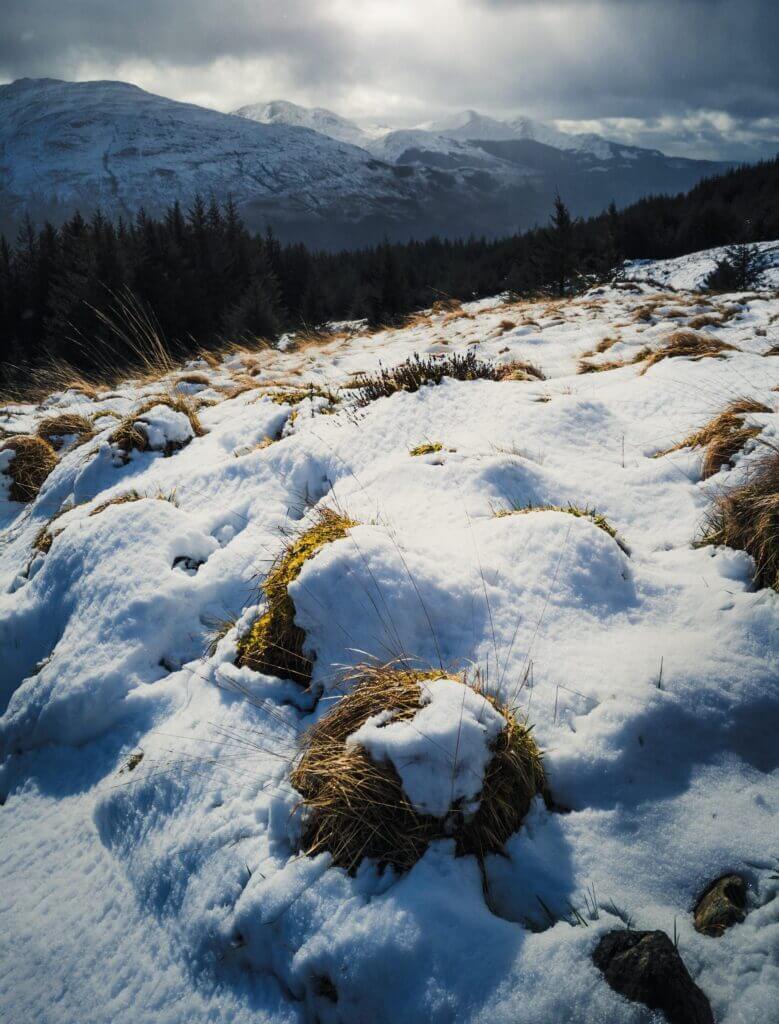
Mountains in the Arrochar Alps, including Munros, Corbetts, and Grahams, contribute to the area’s reputation for wild and rugged terrain. Some peaks rise over 3,000 feet.

Munros

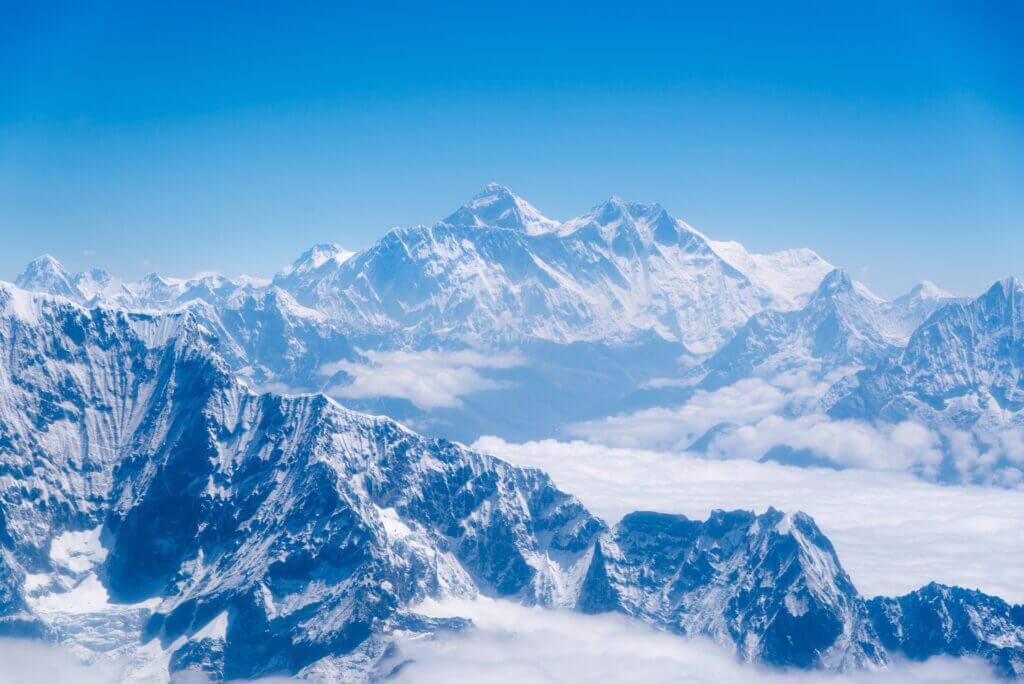
Prepare to be awestruck by the majesty of the Munros! These towering Scottish mountains rise to over 3,000 feet (914.4 m). These peaks offer a unique challenge to mountaineers of all levels as they have no topographical prominence requirement.

The highest peak in the British Isles is Ben Nevis, the pinnacle of the Munros, standing at a staggering height of 4,411 ft (1,345 m). But there’s more to the Munros than just Ben Nevis!

Venture into the realm of Sir Hugh Munro, 4th Baronet (1856-1919). His passion for the great outdoors ignited a fervour for these towering titans. Munro’s Tables, first unveiled in 1891, introduced the world to the breathtaking peaks that now bear his name. These rugged Munros, alongside their equally captivating siblings, the Munro Tops, hold a special place in the hearts of adventurers everywhere.

While the Munros soar above 3,000 feet, standing as a testament to nature’s grandeur, the Munro Tops offer an exhilarating challenge of their own. Sublime yet slightly humbler than their primary counterparts, these secondary summits beckon explorers to conquer their slopes and revel in the magnificent vistas they provide. So lace up your hiking boots, grab your gear, and embark on an unforgettable journey through the awe-inspiring landscape of Sir Hugh Munro’s legacy.

Corbetts

Step into the rugged embrace of the Corbetts, a collection of majestic Scottish mountains that rise between 2,500 and 3,000 feet (762.0-914.4 m), boasting a prominence of over 500 feet (152.4 m). Measured in imperial units, as tradition dictates, these stunning peaks hold their own against the Munros and Munro Tops, commanding attention and admiration.

Each Corbett is also a Marilyn – a proud peak with a prominence of at least 492 feet (150 m). The Scottish Mountaineering Club (SMC) curates a list of these alluring summits, daring adventurers to scale their heights and bask in their glory.

For the fearless souls who master every Corbett, the esteemed title of “Corbetteer” awaits. John Corbett, the trailblazer himself, was the first to claim this honour in 1943. Nearly two decades later, in May 1960, William McKnight Docharty followed in his footsteps, carving his name into mountaineering history. Now, it’s your turn to conquer the Corbetts and join the ranks of these intrepid explorers.

Grahams

Embark on a journey through the breathtaking Grahams, a captivating class of Scottish hills that rise between 600 and 762 meters, showcasing a minimum prominence of 150 meters. These enchanting peaks may not tower as high as their Munro and Corbett cousins, but they exude a charm all their own.

The crowning glory of the Grahams is Beinn Talaidh on the Isle of Mull, standing tall at 761.6m (2,499 ft) and ranking as the 1285th highest mountain in the British Isles. Meanwhile, the title of greatest prominence belongs to the majestic Sgurr na Coinnich at 714m (2,343 ft), securing its place as the 54th most prominent mountain in the region.

Climbing all the Grahams is a challenge not for the faint of heart. Those who conquer each mesmerizing peak earn the prestigious title of Grahamist. Colin Dodgson first claimed this accolade in July 1984, with Andrew Dempster following suit in June 1997. Although the official count of Grahams increased to 231 in November 2022, those who have summited all 219 Grahams over 2000 feet continue to hold the esteemed title of Grahamist. Now, it’s your turn to scale these enchanting peaks and etch your name in the annals of adventure.

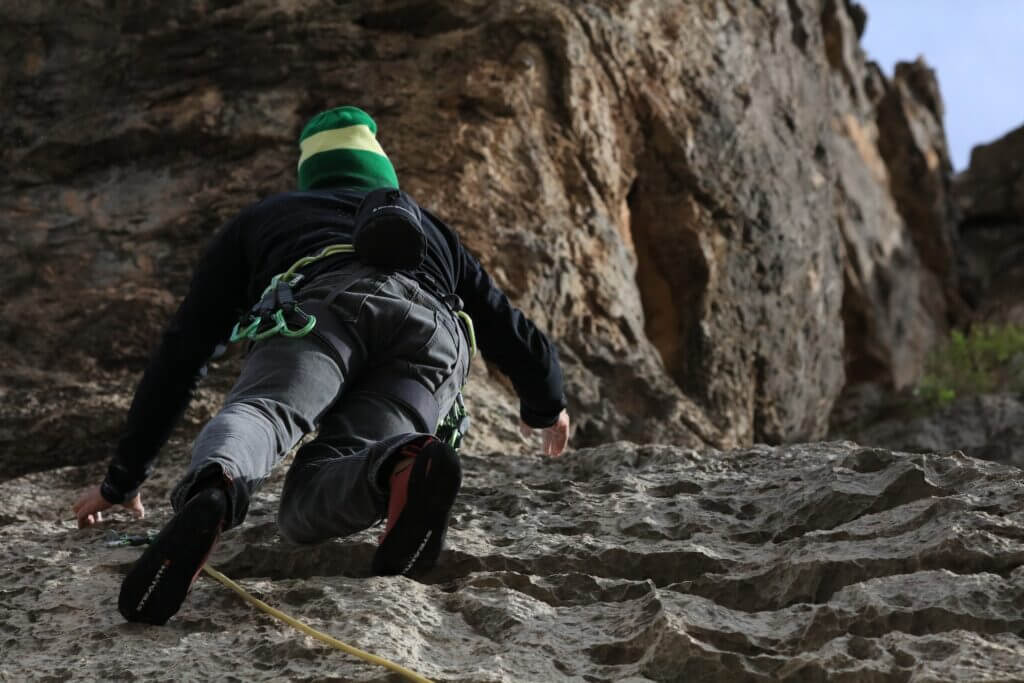
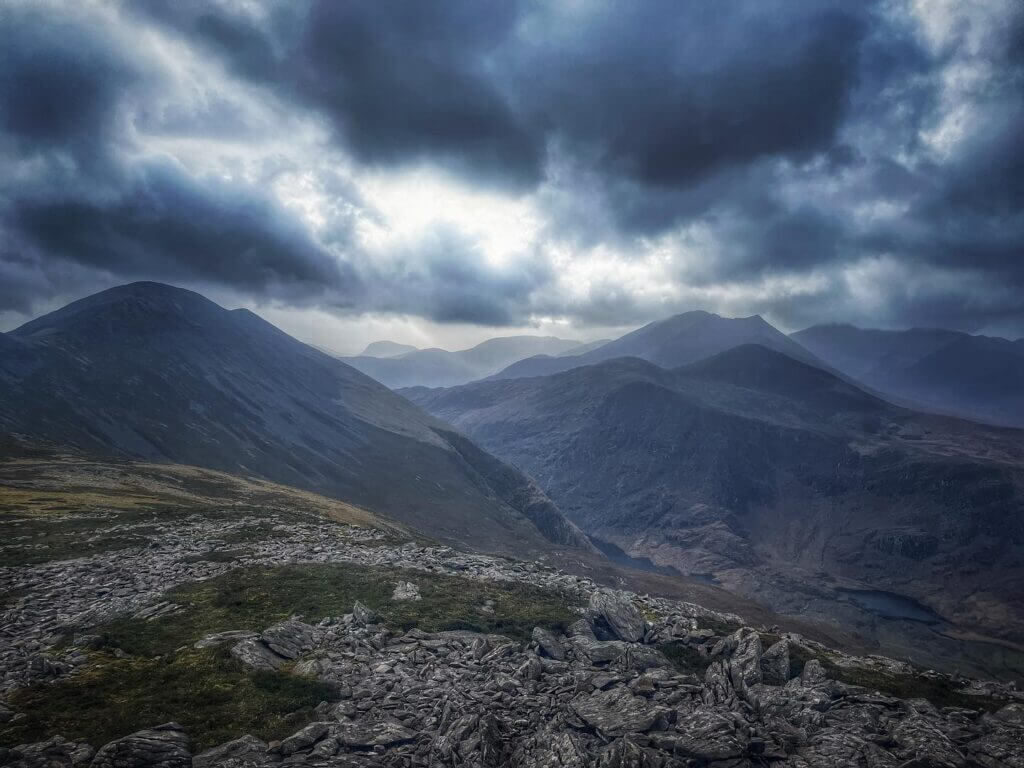
Exploring Most Popular Hill Walking Routes in the Arrochar Alps

Winter Mountaineering in the Arrochar Alps
Credits: Craig Bradford

Scotland’s untamed beauty beckons explorers and adventurers alike, its captivating landscapes promising a feast for the senses. With towering mountains, sweeping hills, and awe-inspiring vistas around every bend, it’s no wonder that hillwalking has become a treasured pastime in this enchanting land.

Immerse yourself in the splendour of the Scottish countryside as you venture forth on some of the most beloved hillwalking routes. These trails offer a unique communion with nature, an opportunity to savour the breathtaking panoramas and bask in the serenity of Scotland’s wild heart.

So, lace up your boots and set your sights on the horizon as we guide you through the most sought-after hillwalking adventures. Embrace the call of the wild, and prepare to be enchanted by the boundless beauty of Scotland’s most captivating landscapes.

The Mighty Cobbler

  • Height: 884m
  • Duration: 4 to 6 hours

It is a popular destination for rock climbing enthusiasts in the Southern Highlands and is classified as a Corbett.

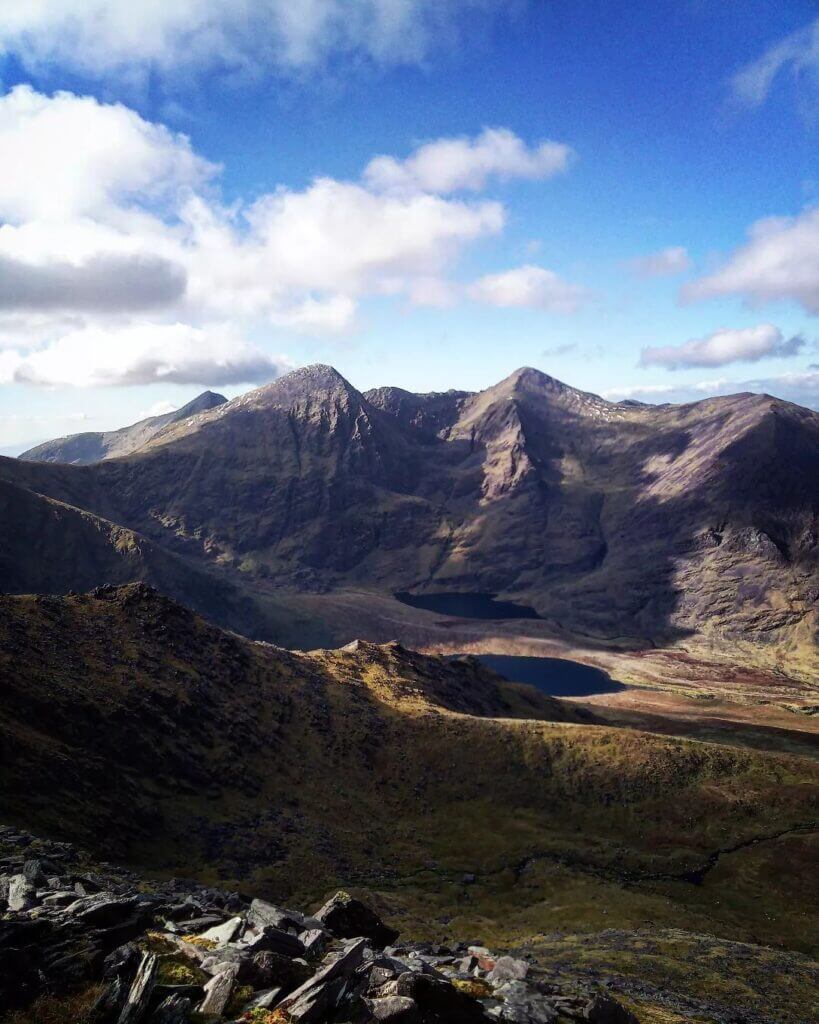
Step into the legendary realm of The Cobbler, a striking mountain whose storied past weaves a tapestry of adventure and intrigue. Though some maps may label it Ben Arthur, The Cobbler’s iconic moniker harkens back to the 19th century, when tales spoke of The Cobbler and his Wife. Nestled within the formidable Arrochar Alps, the mountain’s craggy summit calls to mind a cobbler hunched over his work, its unmistakable silhouette visible from miles away.

The Cobbler boasts a trio of summits, with the middle peak reigning supreme. A rocky outcrop marks the true pinnacle, while the three summits cluster around a small glacial cirque. Surprisingly, their striking forms result from large-scale land slipping rather than ice erosion. The North Peak is riddled with fissures, giving way to thrilling climbing routes that snake through its core. The Summit and South Peak stand as remnants of a once-mighty ridge that has since slipped into Glen Croe, leaving the mountain’s western flank treacherous or impassable.

For mountain enthusiasts, The Cobbler is an unmissable gem in the crown of Argyll and Bute. Offering a distinctive and exhilarating climbing experience, this storied peak awaits those who dare to conquer its rugged heights and bask in the glory of its breathtaking vistas.

Ben Vorlich

  • Height: 943m
  • Duration: 5 to 6.5 hours

Ben Vorlich is a magnificent mountain located in the Scottish Highlands, offering breathtaking views of Loch Lomond, the Arrochar Alps, and surrounding areas. It is often approached from the Loch Sloy side, but there are alternative routes for those seeking a more unique experience.

The journey begins with a leisurely walk along a track leading towards Loch Sloy and its dam. From here, a steep track ascends towards the summit ridge, which can be followed to the peak for stunning panoramic views.

This adventure is suitable for hikers with moderate fitness levels. While the mid-section can present a challenge, one can tackle it with perseverance and determination. The trek typically lasts 5-6.5 hours, making it a perfect day trip for those seeking a thrilling outdoor experience.

Overall, Ben Vorlich is an excellent choice for outdoor enthusiasts looking for an adventure in the Scottish Highlands. The spectacular scenery, combined with the sense of accomplishment after reaching the summit, makes it a journey to remember.

Ben Vane

  • Height: 915m
  • Duration: 5 to 7 Hours

Experience the rugged beauty of Scotland with a trek up Ben Vane, a mountain that may be small in stature at 915m but packs a big punch in terms of adventure. This rocky peak located in the Arrochar region may just qualify for Munro status, but one should not underestimate it. The ascent offers a mix of tracks, steep paths, and stony hillsides, making it an exciting and challenging walk for beginners.

As you set off on the trail along the A82, the mountain may hide from view, adding an air of mystery and intrigue to your journey. The hike begins with an easy start, taking a big track to the base of the mountain, but as you approach the ridge, the terrain becomes more challenging with steeper paths and a slight scramble to the summit.

Ben Ime

  • Height: 1011m
  • Duration: 4.5 to 6.5 hours

If you’re looking for a thrilling hike in the Scottish Highlands, consider conquering Ben Ime. The journey starts by descending west for about 1km along Ben Vane’s western side. Hikers need to be prepared for wet grassy terrain as there are no paths to follow during the gradual descent.

Once you reach the bealach, cross one burn and follow the path uphill that leads towards Beinn Ime. As you ascend, keep aiming for Glas Bhealach and turn southwest. Then, continue south up the northern shoulder of Beinn Ime, following the path that leads to the summit trig-point.

The final ascent stretch is challenging, but the stunning views in all directions from the summit make it worth the effort.

Ben Narnain

  • Height: 926 m
  • Duration: 5-6 hours

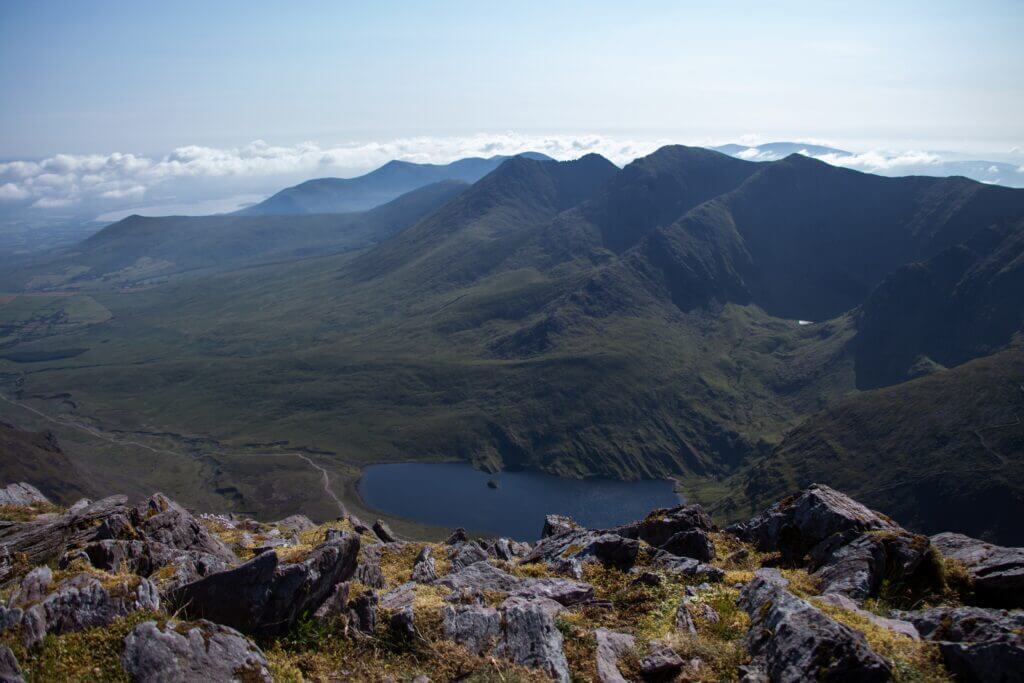
To summarize, from the summit of Beinn Ime, hikers can follow a worn path that heads southeast for about 300 meters before turning and losing height. The path becomes fainter and wetter as hikers approach Bealach a’Mhaim, which can be home to cows in the summer. Once on the summit, hikers can take in panoramic views of the surrounding hills and valleys.

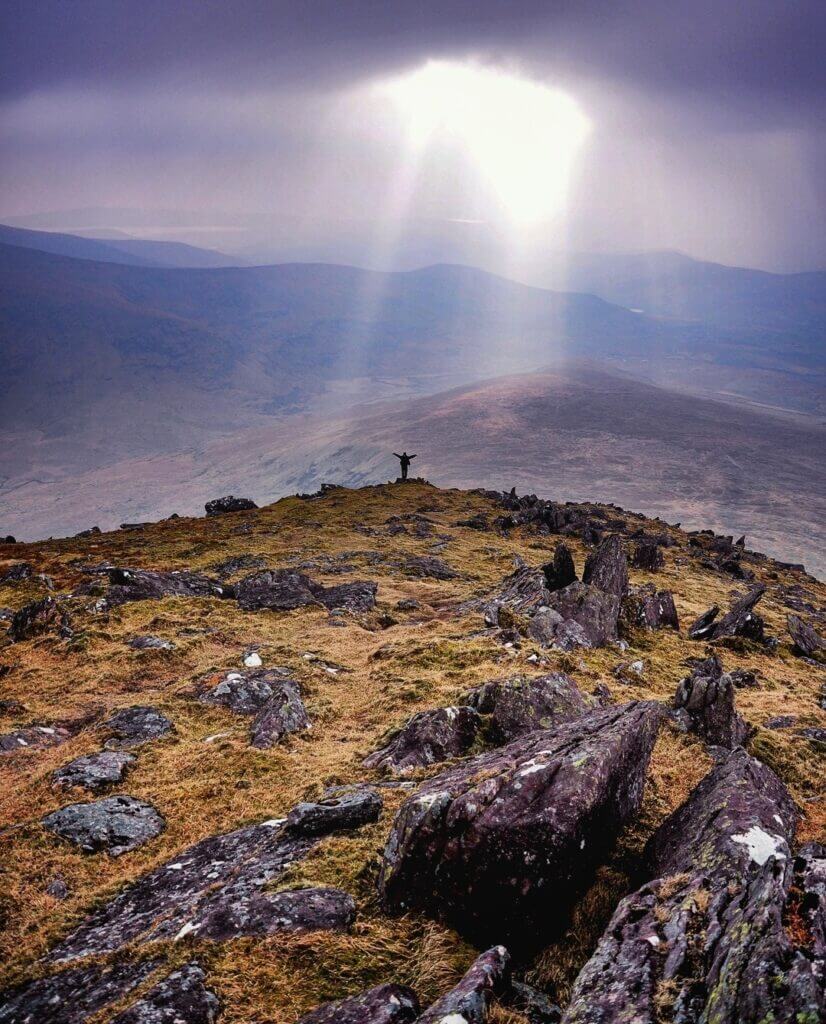
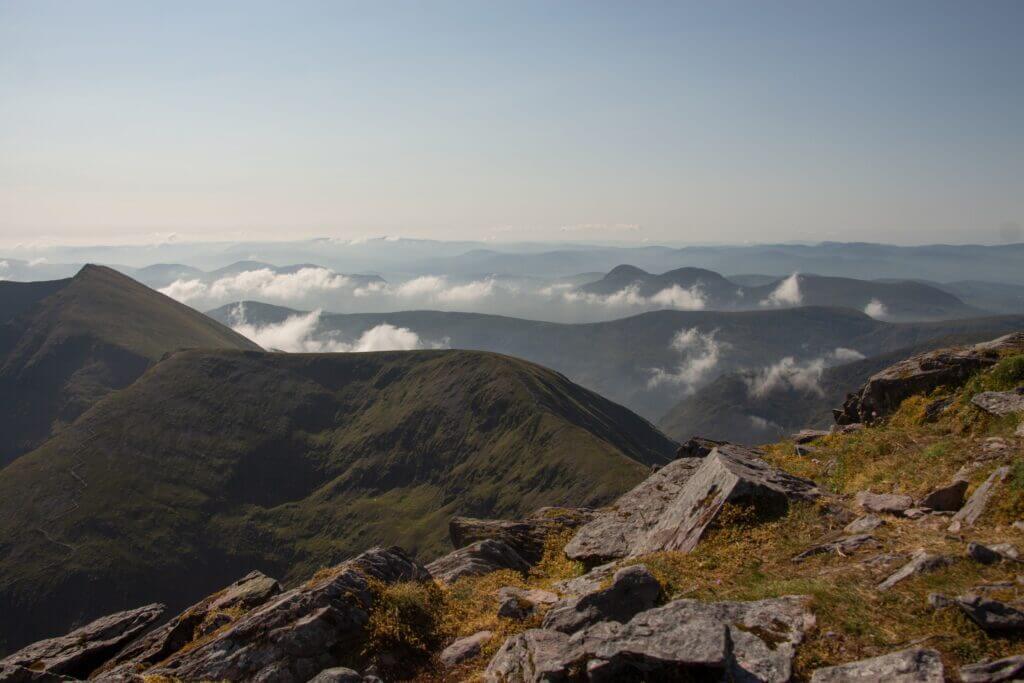
As hikers approach the bouldery ground and the summit cairn and trig point, they are greeted with fantastic views over Loch Lomond to Ben Lomond, framed by some of Beinn Narnain’s crags. In clear weather, hikers may also be able to see directly through the hole on the summit boulder of The Cobbler.

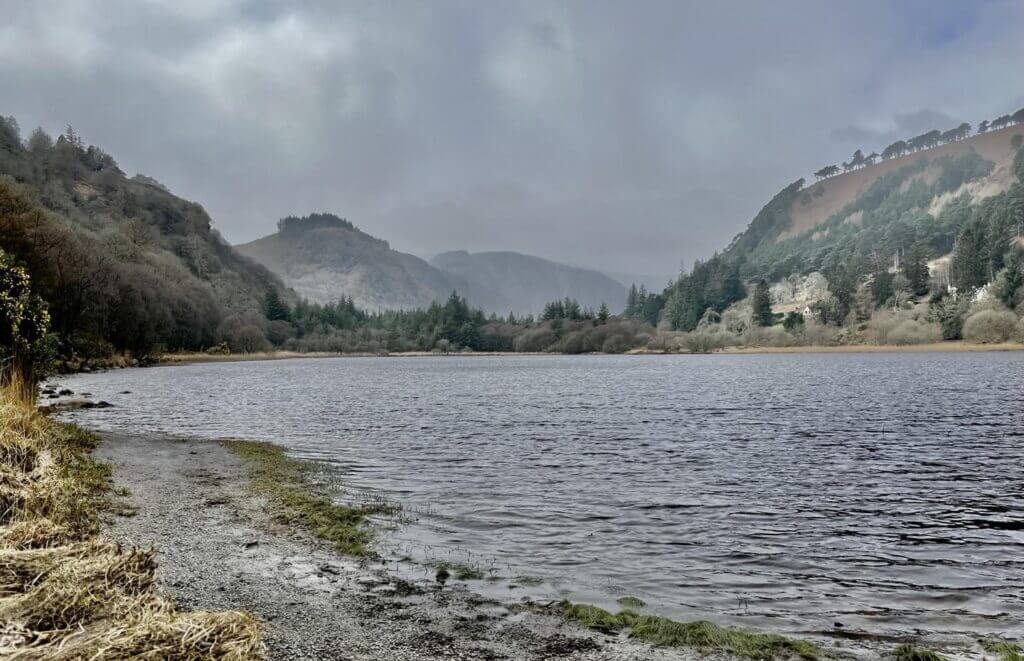
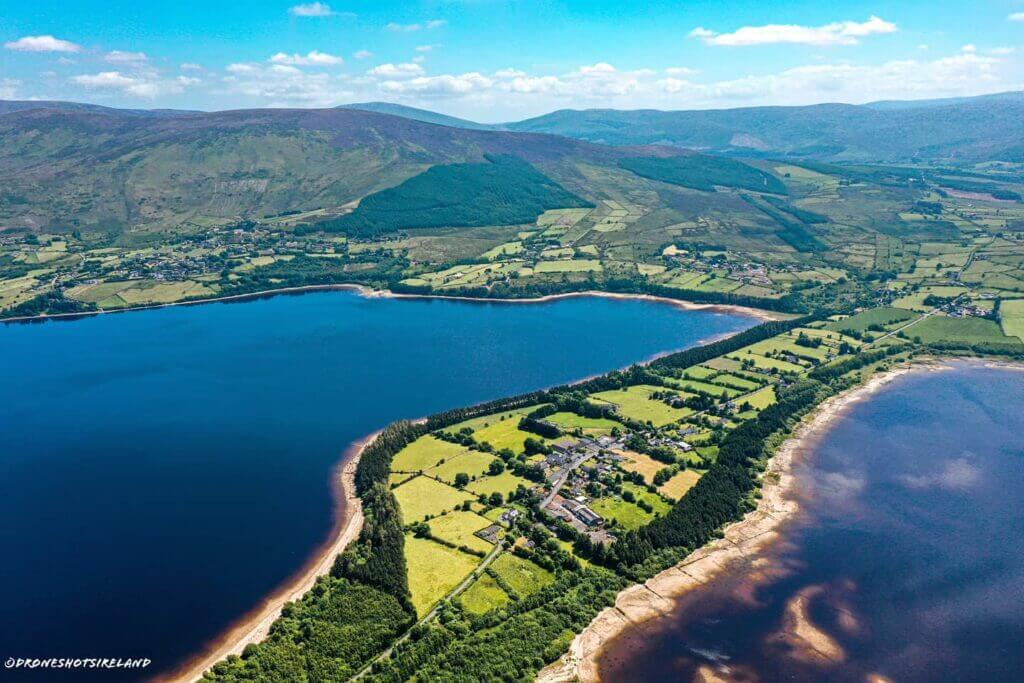
Loch Lomond National Park

Arrochar Alps views
Credits: Scott Jackson

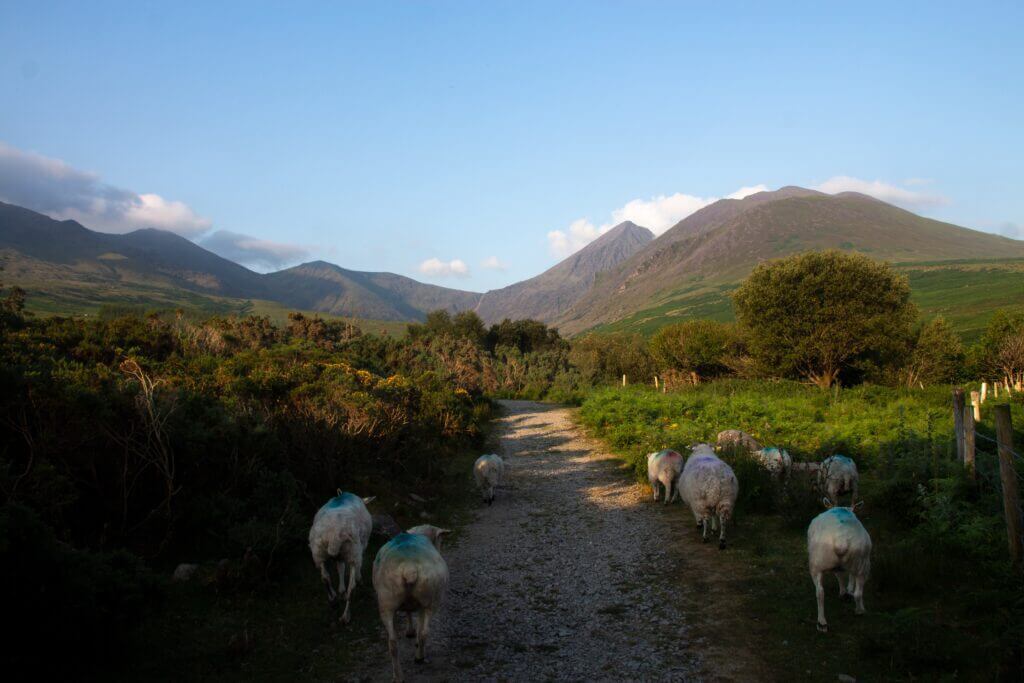
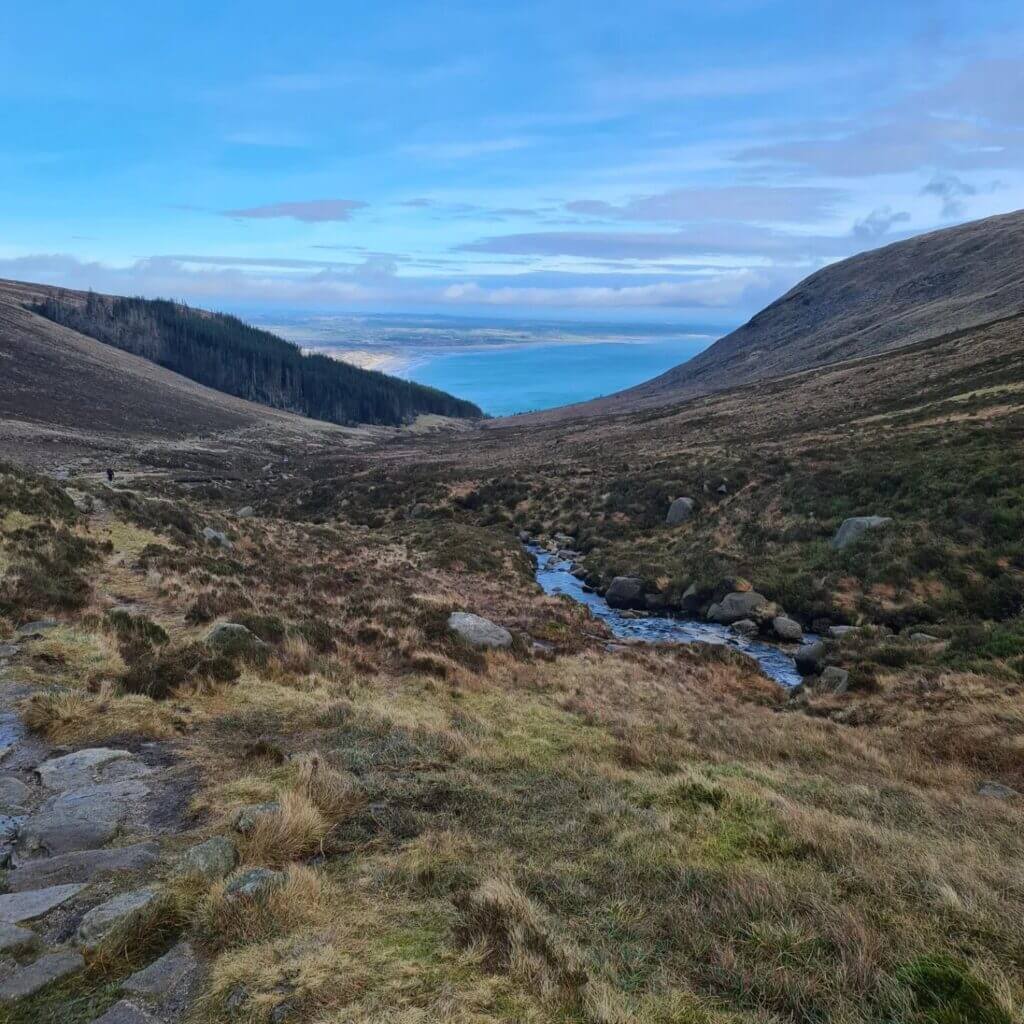
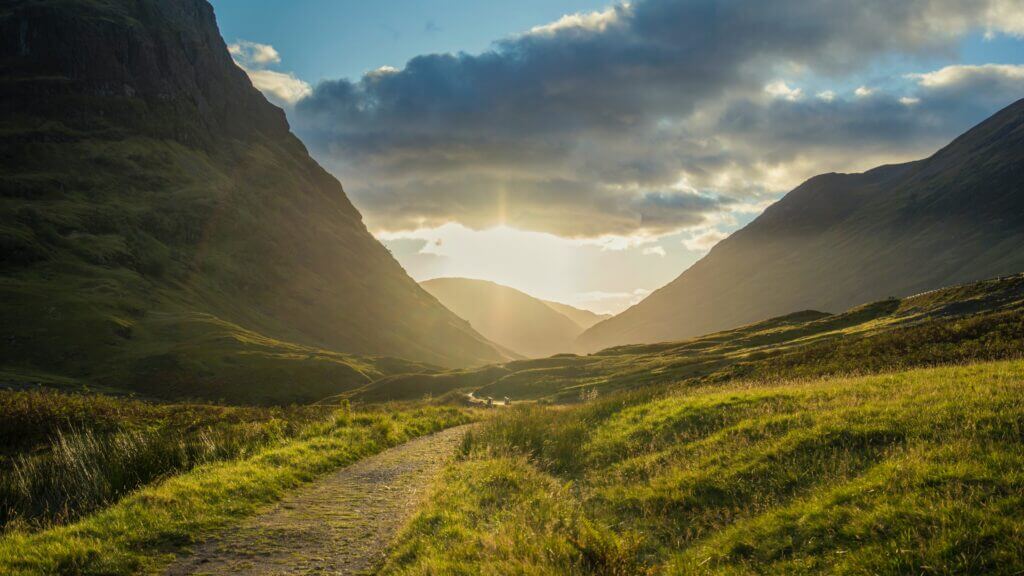
Arrochar is a great base from which to explore Cowal to the north and Loch Lomond to the south. Head north to the Rest and Be Thankful mountain pass, a famous spot for centuries-old views of Glen Croe. You can see the old road snaking its way through up the glen. Imagine the people and horses who have climbed it – looking forward to that rest at the top!

Head south from Arrochar, and you reach Tarbet on Loch Lomond. In 1263 a Viking raiding party hauled their longships two miles overland from Arrochar to Loch Lomond.

Arrochar’s accessibility is one of its greatest advantages. This popular mountaineering base is just an hour’s drive from Glasgow, and it is also reachable by train via the West Highland Line. The village offers a diverse range of accommodations, from hotels to campsites, as well as numerous dining and drinking options.

Rather than travelling to the European Alps, why not consider Arrochar for your next outdoor adventure? With so much to see and do in the surrounding areas, such as Helensburgh & Loch Lomond, you’re sure to have a memorable trip.

Escape the City and Find Solace in Arrochar Alps

Arrochar Alps views
Credits: Lucas Peng

So why not take a break from the hustle and bustle of daily life and immerse yourself in the grandeur of Argyll’s natural wonders? Leave behind the stress and expense of planning a trip elsewhere and embrace the enchanting Arrochar. It’s a decision you won’t regret and an adventure you’ll never forget.

Rayon: A Guide to the Versatile Fabric

April 17, 2023 by endorfeen

Rayon, a semi-synthetic material, originates from natural sources like wood and agricultural products through the regeneration of cellulose. This fabric, also called viscose, shares cellulose’s molecular structure. Rayon, available in diverse types and grades, can replicate the feel and texture of other natural fibres like silk, wool, cotton, and linen. It’s frequently termed artificial silk when it resembles silk.

This adaptable fibre finds use in creating textiles for clothing and various other applications. In rayon production, cellulose undergoes solubilization, enabling the transformation of fibres into their desired shapes. Three common solubilization methods include the cuprammonium process, which uses ammoniacal solutions of copper salts; the viscose process, the most prevalent method, involving alkali and carbon disulfide; and the Lyocell process, which relies on amine oxide.

While the Lyocell process circumvents the neurotoxic carbon disulfide found in the viscose process, it tends to be more expensive. As a result, rayon’s sustainability as an eco-friendly fabric option for outdoor enthusiasts remains a topic of ongoing discussion.

From cellulose to comfort: the Rayon production techniques

Cellulose undergoes dissolution and conversion back into insoluble fibrous cellulose to create rayon. The cuprammonium method, viscose method, and lyocell process serve as the predominant techniques for this regeneration process.

Rayon is made from Cellulose. Some Rayon can be made of Bamboo
Photo by Eleonora Albasi on Unsplash

Employed for over a century, these methods showcase their enduring presence in the textile industry.

The cuprammonium methods

Swiss chemist Matthias Eduard Schweizer (1818-1860) found that tetraamine copper dihydroxide could dissolve cellulose. In 1897, Max Fremery and Johann Urban developed a technique to create carbon fibres for use in light bulbs. The production of cuprammonium rayon for textiles commenced in 1899 at Vereinigte Glanzstoff Fabriken AG in Oberbruch near Aachen. In 1904, J.P. Bemberg AG made significant improvements that rendered artificial silk a viable alternative to genuine silk.

Cuprammonium rayon shares similar properties with viscose. During production, cellulose combines with copper and ammonia, forming Schweizer’s reagent. Owing to the adverse environmental effects of this method, some countries, including the United States, have ceased manufacturing cuprammonium rayon. Although considered a historical process, one company in Japan continues to produce cuprammonium rayon.

Another solvent used in this fabric’s production is tetraamminecopper(II) sulfate.

The viscose method

English chemist Charles Frederick Cross, along with his colleagues Edward John Bevan and Clayton Beadle, patented their artificial silk in 1894. They named the material “viscose” due to the highly viscous solution involved in its production. The process relied on the reaction of cellulose with a strong base and subsequent treatment with carbon disulfide to create a xanthate derivative. The xanthate is later converted back into cellulose fibre.

The UK-based Courtaulds Fibres manufactured the first commercial viscose rayon in November 1905. They established an American division called American Viscose (later known as Avtex Fibers) in 1910 to produce their formulation in the United States. The term “rayon” was coined in 1924, with “viscose” referring to the viscous organic liquid used in producing both rayon and cellophane. In Europe, however, the fabric itself became known as “viscose“, which the US Federal Trade Commission (FTC) has deemed an acceptable alternative name for rayon.

The viscose method uses wood as a cellulose source, while other rayon production techniques require lignin-free cellulose. This makes viscose more cost-effective, so it has traditionally been used on a larger scale than other methods. However, the original viscose process generated significant amounts of contaminated wastewater. Modern technologies have reduced water usage and improved wastewater quality. Until the 1930s, rayon was only produced as a filament fibre, but subsequent developments enabled the utilization of “broken waste rayon” as a staple fibre.

Structurally modified viscose

The physical properties of rayon remained consistent until the 1940s, when high-tenacity rayon was developed. Further advancements led to the creation of high-wet-modulus rayon (HWM rayon) in the 1950s, with research in the UK largely centred around the government-funded British Rayon Research Association.

High-tenacity rayon, a modified version of viscose, boasts nearly double the strength of HWM rayon and is commonly utilized for industrial purposes such as tire cords.

Around 1935, industrial applications of rayon surfaced, with the material replacing cotton fibres in tires and belts. Industrial rayon variants displayed a distinct set of properties, with tensile strength and elastic modulus being of utmost importance.

Modal, a genericized trademark of Lenzing AG, refers to a type of (viscose) rayon that is stretched during production to align the molecules along the fibres. Two forms of Modal are available: “polynosics” and “high wet modulus” (HWM).

HWM rayon, an enhanced form of viscose, exhibits increased strength when wet and can undergo mercerization similar to cotton. Known as “polynosic,” HWM rayons are dimensionally stable, resistant to wear, and maintain a soft, silky feel without shrinking or losing shape when wet. The trade name Modal is sometimes used to identify them.

Often used solo or blended with other fibres like cotton or spandex, Modal appears in clothing and household items such as pyjamas, underwear, bathrobes, towels, and bedsheets. Resistant to damage from tumble-drying, Modal exhibits less pilling than cotton due to its fibre properties and decreased surface friction. Derived from spinning beech-tree cellulose, Modal serves as a more environmentally friendly alternative to cotton, consuming 10–20 times less water on average during production.

Lyocell method

The lyocell process is based on dissolving cellulose products in a solvent called N-methyl morpholine N-oxide (NMMO). This method is not as widespread, primarily due to its higher cost compared to the viscose process.

Originating from cellulose, the lyocell process employs dry jet-wet spinning and was developed by the now-defunct American Enka Company and Courtaulds Fibres. Lenzing’s Tencel serves as an example of a lyocell fibre.

A key distinction between the lyocell and viscose processes is that the former does not involve the highly toxic carbon sulfide. The term “Lyocell” has evolved into a genericized trademark used to describe the lyocell process for creating cellulose fibres.

Related materials

Materials that are closely related to regenerated cellulose are not, in fact, regenerated cellulose themselves but rather esters of cellulose. These cellulose derivatives share similarities with regenerated cellulose but possess distinct chemical structures and properties.

Nitrocellulose

Nitrocellulose is a cellulose derivative that is soluble in organic solvents. Its primary applications include being utilized as an explosive or as a lacquer. Notably, many early plastics, such as celluloid, were manufactured from nitrocellulose due to its unique properties and versatility.

Acetate

Cellulose acetate bears many similarities to viscose rayon and was once regarded as the same textile. However, there are key differences between the two materials.

While rayon is heat-resistant, acetate is susceptible to melting. Special care must be taken when laundering acetate, either through hand-washing or dry cleaning, as acetate garments can disintegrate when exposed to heat in a tumble dryer.

Nowadays, it is mandatory to distinguish between the two fabrics on garment labels, ensuring consumers are aware of the specific material used.

Cellophane

Cellophane is typically produced using the viscose process, similar to rayon. However, instead of being formed into fibres, the material is dried into thin, transparent sheets, resulting in its distinctive appearance and properties.

Rayon’s major properties

Rayon is a versatile fibre, often praised for possessing comfort properties similar to those of natural fibres. Its drape and slipperiness can resemble nylon, while its texture can mimic silk, wool, cotton, and linen. Easily dyed in various colours, rayon fibres boast softness, smoothness, coolness, and high absorbency. While rayon may not consistently insulate body heat, its cool and sometimes slightly slimy feel makes it ideal for hot and humid climates.

Regular viscose rayons have low durability and appearance retention, particularly when wet, and exhibit the least elastic recovery of all fibres. However, high-wet-modulus (HWM) rayon is significantly stronger and offers improved durability and appearance retention. Dry cleaning is recommended for regular viscose rayon, while HWM rayon can be machine-washed.

Characterized by lengthwise striations and an indented circular cross-section, regular rayon differs from HWM and cupra rayon, which have rounder cross-sections. Filament rayon yarns range from 80 to 980 filaments per yarn and 40 to 5,000 denier in size. Staple fibres, measuring 1.5 to 15 denier, are mechanically or chemically crimped.

Although rayon fibres are naturally very bright, adding delustering pigments reduces this inherent brightness.

Tracing the History of Rayon Fabrics

Viscose

Hilaire de Chardonnet, a French scientist and industrialist, invented the first artificial textile fibre, artificial silk, which led to the creation of viscose. Edward John Bevan and Charles Frederick Cross, two British scientists, patented their cellulose-dissolving process in 1892. They later formed the Viscose Syndicate and the British Viscoid Co. Ltd. to commercialize the process.

Research from the 1930s revealed that 30% of American rayon workers experienced severe health effects due to carbon disulfide exposure. Courtaulds, however, made efforts to keep this information from being published in Britain.

During World War II, Nazi Germany forced political prisoners to work under horrific conditions at the Phrix rayon factory in Krefeld. It used forced labour for rayon production across occupied Europe.

In the 1990s, viscose rayon manufacturers faced lawsuits over negligent environmental pollution. Emissions abatement technologies, such as carbon-bed recovery, were not consistently applied across the industry. Pollution control and worker safety eventually became limiting factors in production costs.

While Japan has reduced carbon disulfide emissions per kilogram of viscose rayon produced by around 16% per year, other rayon-producing countries, including China, have uncontrolled emissions. Rayon production has remained steady or decreased, except in China, where it continues to grow as of 2004.

Rayon production has largely shifted to developing countries like China, Indonesia, and India. Disability rates in these factories remain unknown as of 2016, and concerns for worker safety persist.

Lyocell as a Sustainable Alternative to Viscose

Environmental concerns drive the development of lyocell

Environmental concerns drove the development of lyocell. Researchers sought a less harmful manufacturing process for rayon compared to the viscose method.

The lyocell process was developed in 1972 by a team at the now-defunct American Enka fibres facility in Enka, North Carolina. In 2003, Neal E. Franks received the Henry E. Millson Award for Invention from the American Association of Textile Chemists and Colorists (AATCC) for lyocell. Between 1966 and 1968, D. L. Johnson of Eastman Kodak Inc. studied NMMO solutions. From 1969 to 1979, American Enka tried unsuccessfully to commercialize the process.

Mcorsley first detailed the fundamental process of dissolving cellulose in NMMO in a 1981 patent for Akzona Incorporated. During the 1980s, Akzo licensed the patent to Courtaulds and Lenzing.

Commercialization and expansion of lyocell production

Courtaulds Fibres developed the fibre under the brand name “Tencel” in the 1980s. In 1982, a pilot plant was built in Coventry, UK, and production increased in 1984. In 1988, a semi-commercial production line opened at the Grimsby, UK, pilot plant.

The process was first commercialized at Courtaulds’ rayon factories in Mobile, Alabama (1990) and Grimsby (1998). By 1993, the Mobile Tencel plant reached full production levels of 20,000 tons per year. By 2004, production had quadrupled to 80,000 tons.

Lenzing began a pilot plant in 1990 and commercial production in 1997. In 2004, Lenzing was producing 40,000 tons. In 1998, Lenzing and Courtaulds resolved a patent dispute.

Merger and acquisition in the lyocell industry

In 1998, Akzo Nobel acquired Courtaulds and merged the Tencel division with other fibre divisions under the Accordis brand. Subsequently, CVC Partners purchased these divisions from Akzo Nobel. In 2000, Lenzig AG acquired the Tencel division from CVC, and merged it with their “Lenzing Lyocell” business, retaining the Tencel brand name. By 2015, Lenzing AG had become the largest lyocell producer, boasting an annual production of 130,000 tonnes.

As of 2018, the lyocell process is not so widely used as it remains more expensive than the viscose process.

Questions of sustainability

Rayon’s manufacturing process

Rayon production can indeed have negative environmental impacts. Sourcing cellulose from rainforests contributes to deforestation and habitat destruction, particularly in regions like Sumatra and Indonesia. The production process can also be harmful to workers, local populations, and water sources due to the use of toxic chemicals.

While some companies, like Lenzing, have developed more eco-friendly alternatives such as modal rayon, it is essential to consider the overall environmental cost. The large-scale harvesting of softwood trees for cellulose production still contributes to deforestation and resource depletion, despite the fabric’s biodegradability.

As a consumer, it’s important to be aware of the environmental and ethical implications of the products you purchase. When possible, choose clothing and textiles made from more sustainable, eco-friendly materials or from companies that implement environmentally responsible practices in their production processes. By supporting sustainable practices, you can contribute to reducing the negative impacts of rayon production on the environment and communities.

Rayon’s disposal and biodegradability

The biodegradability of different fibres has been studied. Rayon is more biodegradable than cotton, which in turn, is more biodegradable than acetate. However, some factors, such as water repellency, can affect the decomposition rate. It is also worth noting that some insects, like silverfish, can consume rayon, but the damage caused is typically minimal.

In marine environments, research has shown that rayon contributes significantly to the total fibres found in deep ocean areas. A 2014 survey found that rayon accounted for 56.9% of fibres in deep ocean areas. A 2016 study found that cotton was the most frequent match (50%), followed by other cellulosic fibres at 29.5%, which includes rayon/viscose and other natural fibres. However, it is challenging to distinguish between natural and man-made cellulosic fibres using methods like Fourier transform infrared spectroscopy, which can lead to discrepancies in the data.

This information highlights the importance of considering the environmental impact of various fibres and materials used in textile production. As consumers, we can make a difference by choosing products made from sustainable, eco-friendly materials or supporting companies that follow environmentally responsible practices.

Sustainable forestry

The concerns about links between rayon manufacturers and deforestation have indeed led to collaborations between organizations like the Forest Stewardship Council (FSC), the Programme for the Endorsement of Forest Certification (PEFC), and CanopyPlanet to address these issues. CanopyPlanet is a non-profit organization that works with the forest industry to protect endangered forests and promote sustainable, eco-friendly practices.

To increase transparency and awareness about the environmental impact of man-made cellulosic fibre production, CanopyPlanet publishes a yearly Hot Button report that ranks and scores manufacturers globally based on their commitment to responsible sourcing, sustainable production, and efforts to mitigate deforestation. The report uses a 35-point scale to evaluate manufacturers.

In the 2020 Hot Button report, Birla Cellulose scored the highest with 33 points, followed by Lenzing with 30.5 points. These scores reflect the companies’ commitment to sustainability and responsible sourcing of raw materials. By evaluating and ranking manufacturers, the Hot Button report aims to encourage improvements in the industry. It helps consumers make more informed choices when it comes to purchasing products made from these fibres.

Who are the key manufacturers of Rayon?

In 2018, the global production of viscose fibre was approximately 5.8 million tons. China was the largest producer, accounting for about 65% of the total production. Various trade names are used in the rayon industry to label different types of rayon in products.

Bemberg, a trade name for cuprammonium rayon, was developed by J. P. Bemberg. It has a smaller diameter and is closer to silk in feel than viscose rayon. Currently, Bemberg is only produced in Japan and has finer fibres than viscose rayon.

Lenzing AG manufactures popular rayon forms, including Modal and Tencel. Tencel, also recognized as lyocell, undergoes a unique solvent recovery process and is deemed a separate fibre by the US FTC. Courtaulds Research at the Grimsby plant in England initially produced Tencel lyocell commercially, having developed the process to dissolve cellulose without triggering a chemical reaction.

Birla Cellulose is another major manufacturer of rayon with plants in India, Indonesia, and China. Accordis was a significant producer of cellulose-based fibres and yarns, with production facilities across Europe, the US, and Brazil.

Visil rayon and HOPE FR are flame-retardant forms of viscose that incorporate silica into the fibre during manufacturing.

The North American Rayon Corporation in Tennessee was a producer of viscose rayon until it closed in 2000.

Indonesia is among the world’s largest rayon producers. With Asia Pacific Rayon (APR) they have an annual production capacity of 0.24 million tons. This highlights the global distribution of rayon production and the wide range of trade names and types used within the industry.

What Is Sport Climbing?

April 15, 2023 by Teddy Dondanville

The term “rock climbing” can be a bit misleading. It makes the sport sound like a singular activity. When in reality, rock climbing has many different styles. Not including some niche examples of climbing, most climbers would agree that the three most popular styles of climbing are– bouldering, traditional climbing, and sport climbing.

Of the three, I would argue that sport climbing is the most well-known. Sport climbing is where you ascend a single- or multi-pitch route, protecting yourself by clipping your rope into fixed bolts and anchors drilled into the rock, all the while being belayed by your partner.

Keep reading to learn about sport climbing, what separates it from traditional climbing, and for guidance on how to get started.    

Sport vs. Trad Climbing

Traditionally, climbers would place protection equipment into cracks in the wall to protect themselves. This style of climbing is called traditional or trad climbing.

Sport climbing is a newer style first popularized in the 1980s. Sport climbers rely on protection bolts permanently drilled into the rock to protect themselves in the event of a fall instead of trad gear.

With protection bolts, climbers could unlock large swathes of rock that had previously gone unclimbed because they did have cracks for trad gear. 

Due to the “permanent” nature of bolts, sport climbing is often understood as less committing and less risky. However, to be clear– sport climbing, like all forms of climbing, is inherently dangerous. 

Sport climbing is also considered more accessible than trad climbing because the expertise required to operate the equipment, i.e., quickdraws, is much less involved. However, that is not to say that sport climbing is easy. Because of modern climbing technology and bolting techniques, sport climbers continue to evolve the sport with incredibly difficult first ascents.

A rock climber climbs on top rope in Joshua Tree National Park.

Lead Climbing vs. Top Roping

When you go sport climbing, you will either be partaking in lead climbing or top roping.

The term leading climbing comes from someone taking the lead, or going first, also known as the lead climber or leader. Lead climbing is when you tie into the climbing rope and bring it up the climb with you, periodically clipping the rope into protection bolts along the way in case you fall. 

When a lead climber reaches the top of a sport climb, they clip their rope into an anchor they build themselves or into the fixed anchor. Then they can be lowered by their belayer or rappel down themselves. 

On the other hand, top roping is when you tie into the climbing rope that is already secured in the anchor at the top of the climb, hence the name, top roping.

Building or threading prebuilt anchors and dropping a rope on a climb to make a top rope can be accomplished from the top of the cliff. However, as I just mentioned, the lead climber who goes first can also set up the top rope by lead climbing.

The risks involved with lead climbing are more significant than top roping because the leader is at risk of taking more significant falls, some of which could result in a ground fall if the leader doesn’t adequately protect themselves or if the belayer makes a mistake.

On the other hand, top roping falls are drastically less severe. Although sometimes they do result in a pendulum swing that could cause safety issues. 

The Essential Gear

Compared to trad climbing, the list of essential gear for sport climbing is shorter. But then again, compared to bouldering, sport climbing requires quite a lot. 

The following list of items is what I consider essential to be an autonomous sport climber. But of course, you can climb with friends and get away with having a lot less (wondering what you need to wear?).

  • Helmet
  • Harness
  • Climbing shoes
  • Chalk bag
  • Rope
  • Quickdraws
  • Belay device
  • Backpack

Optional Accessories

The items I mentioned above are essential for going sport climbing autonomously. The following items are optional accessories that are not mandatory but that improve your experience while sport climbing. 

  • Belay gloves
  • Belay glasses
  • Climbing tape
A sport climber works their way up a sport climb.

Climbing Terminology

If you are new to climbing, you might have felt like the conversations you overheard in the gym or at the crag were from another language. They could have been if you lived in a diverse metropolitan area or were climbing in a well-known destination. 

However, the chances are you were hearing distinct climbing slang and terminology you haven’t mastered yet. Below is a short glossary of terms to jump-start your climbing vocabulary. 

  • Beta – advice that another climber provides that assists you in some way, such as how to climb the crux or where the good holds are.
  • On-Sight – when you successfully climb a route first try from the ground without seeing it before or receiving beta.
  • Redpoint – when you successfully send a route from the ground after working out the moves and perfecting it.
  • Whip – a significant fall, also referred to as a whipper, a lead climber takes when they are well above their last piece of protection.
  • Spraying – providing unsolicited advice (beta) to another climber who does not want your assistance.
  • Cleaning – when you remove all the quickdraws from the bolts so you can reuse them on a different climb.

Climbing Crag Etiquette

Proper etiquette comes with everything in life. For example, there are proper ways to drive a car and move around busy public areas. The same goes for sport climbing. So before you head to the crag, ensure you’re up-to-date on climbing crag etiquette. 

  • Monitor your volume. Try hard noises, and communicating with your climbing partner is acceptable. However, loud music and raucous behaviour are usually frowned upon.  
  • Pack it in, pack it out. Everything you bring with you, including your trash, food scraps, and bits of climbing tape, must also leave with you. 
  • Avoid creating a yard sale. Sport climbing crags are shared, some of which have limited space, so mitigate the extent to which your equipment spreads out throughout the crag like a yard sale.
  • Play nice with others. Simple etiquette like waiting your turn, communicating respectfully, and sharing goes a long way toward a pleasant day out.  

Sport Climbing at the Olympics

The sport of rock climbing has exploded in popularity over the past five years. As a result,  climbing is now an Olympic Sport. Sport climbing debuted in the 2020 Olympics in Tokyo (which took place in 2021 because of the COVID-19 pandemic).
In Tokyo, climbing athletes competed in a combined format, including sport climbing, bouldering, and speed climbing. However, for the 2024 Olympics in Paris, athletes can compete in a sport and bouldering combined event or separately in speed climbing.

The Olympic Rings in Tokyo, Japan

What Should You Wear When Climbing Indoors?

April 13, 2023 by Teddy Dondanville

During my rock guiding work outdoors, I obsess over selecting an outfit perfect for the day’s objective and weather. Similarly, I provide a lot of guidance to my clients about what to wear while rock climbing. 

But one of the reasons I love climbing indoors so much is that I can wear practically anything while doing it. For example, my go-to outfit for a session at the gym is a pair of regular shorts and a cotton t-shirt. But, depending on the season and the indoor climate, I prefer pants and maybe a light sweater.

Dressing for indoor rock climbing is pretty simple. Nonetheless, there are some considerations to make before you go. So, keep reading for some recommendations for what to wear while rock climbing.    

What to Wear for Indoor Rock Climbing

Ultimately– you can wear whatever you please when you go rock climbing indoors. However, some clothing is indeed better than others. So, when thinking about what to wear for indoor rock climbing, I recommend you consider the following. 

Flexibility and Mobility

You don’t want your clothing to inhibit your flexibility and mobility. In other words, you want your clothing to move with you and not against you. 

Flexible and form-fitting clothing that doesn’t inhibit your mobility is ideal because climbing requires acrobatic and gymnastic-like movements such as stretching, stepping, reaching, jumping, crouching, lunging, and squatting. 

Lightweight and Breathable

Your clothing should be lightweight and comfortable. Lightweight clothing tends to be more breathable. And breathability is important for temperature control and ventilation.

For example, imagine climbing in a thick wool turtleneck. Are you sweating? Because I am.

Now imagine climbing in a lightweight, cotton, or synthetic textile t-shirt. That feels better, right?

The same goes for your bottom layers. Again, lightweight and flexible shorts or pants are recommended over anything heavy, baggy, or thick and heavy.

Comfortable and Confidence Inspiring 

Above all else is– comfort. Climbing gyms, and the climbing community in general, can be wonderful and welcoming spaces that want you to feel comfortable. 

So, remember, wear whatever clothing makes you feel comfortable and inspires your confidence.     

What About Footwear? Climbing Shoes Are Advised

Climbing gyms are like bowling alleys. They prefer, and you perform better when you wear the appropriate footwear, which in this case, is climbing shoes. 

If you are new to climbing and don’t have climbing shoes, no worries. Most climbing gyms have shoes you can rent for a small fee. Climbing shoes are designed to give you more grip when you step on large climbing holds. And they enhance your ability to step on tiny edges.

However, you don’t have to wear your climbing shoes for the entire session. It’s common for climbers to take off their shoes and wear comfier sandals or street shoes when their feet become uncomfortable. 

This is also the best practice for going to the bathroom so your climbing shoes don’t spread germs from the bathroom onto the climbing routes.

And if you own climbing shoes, we still recommend taking them off when you’re not climbing to preserve the rubber for longer. 

Climber wears climbing shoes, comfortable clothing, and a chalk bag while climbing indoors
Photo Courtesy of Bady Abbas

Accessories and Other Gear for Indoor Climbing

In terms of accessories, think simple. Essentially, you want to eliminate the risk of anything falling off you and becoming a hazard for people below.

Besides climbing shoes, the only other gear you need boulder indoors is a chalk bag. However, you will need a harness if you plan to climb on ropes or auto-belays. In most gyms, you can rent harnesses for a small fee. 

Other accessories, like gloves, hats, or scarves, are unnecessary. Hats can fall off, gloves inhibit your ability to grip the holds, and scarves can become tangled.

However, I do recommend bringing a water bottle and some snacks.  These items don’t come up the wall with you, but they are nice to have because climbing is a workout!     

What You Should Avoid While Climbing Indoors 

I am not your parent, so I cannot tell you what not to wear. However, I want to make a few recommendations about what to avoid when climbing indoors for safety’s sake.

  • Avoid dangling clothing. Dangling objects can get stuck on the route or affect the functionality of your belay device.
  • Avoid overly voluminous clothing. Large skirts or dresses can impact how your harness fits and affects your climbing partner’s ability to double-check your equipment.
  • Avoid climbing with items in your pockets. For example, cell phones can fall out and become a hazard.
  • Avoid short shorts. Overly short shorts provide a ton of flexibility. However, they can bunch up from your harness’ leg loops and become uncomfortable.
  • Avoid climbing with your hair down. If you have long hair, wearing it up in a ponytail or something similar is recommended so it cannot obstruct your vision while climbing or get stuck in your belay device.

FAQs About What to Wear When Climbing Indoors

Can I wear socks?

Yes, you can wear socks when you wear rock climbing shoes. This is particularly popular for those who rent climbing shoes from the gym. However, most climbers who own shoes do not wear socks when they climb. 

What shoes do I need to bring?

When you go rock climbing indoors, wear comfortable shoes or sandals and change into rock climbing shoes once you get there. Then, in between routes or boulder problems, you can switch back into street shoes or sandals to be more comfortable or for going to the bathroom. 

Can I wear jeans while rock climbing?

You sure can! Many people wear denim jeans when they go rock climbing. However, just understand that denim jeans may not be the most lightweight, breathable, and flexible choice. 

Should I wear gloves rock climbing?

No, it is unnecessary to wear gloves while rock climbing. Gloves inhibit sensitivity and the surface contact friction between your hands and the holds.

However, gloves are popular for belaying. Belay gloves protect your hands and can provide more control over the rope. 

Similarly, some climbers will wear specifically designed crack gloves for crack climbing. Crack gloves protect your hands and provide extra grip between the inside of the crack and the backs of your hands.   

Sport vs. Trad Climbing– What are the Differences?

April 11, 2023 by Teddy Dondanville

Sport and traditional climbing, shortened to trad climbing, are the two most popular climbing styles. Therefore, when a new climber wants to start climbing outside, and they don’t want to begin pebble wrestling (aka bouldering), it’s common to want to compare the two – sport vs. trad climbing. 

Realistically, there are similarities between the two styles. For example, they both require similar climbing gear, like a dynamic climbing rope. However, to understand the two disciplines properly, it’s helpful to look at the key differences.

Read on for a brief synopsis of what sport and trad climbing are all about. And for eight critical differences between the two.

Sport vs Trad Climbing

Sport climbing is a younger style of rock climbing where the climber ascends a rock face protecting themselves by clipping their rope into pre-drilled bolts along the way. When they reach the top, they clip into pre-drilled anchors and can be lowered by their belayer or belay their second if multi-pitching.  

In comparison, trad climbing is an older style of rock climbing where the climber ascends a rock face protecting themselves by clipping their rope into removable pieces of protection that they place into cracks in the rock. When they reach the top, they build a trad anchor and can be lowered by their belayer or belay their second. 


A trad climber with trad gear climbs upwards through a wide chimney system
Photo Courtesy of Tommy Lisbin

Sport Climbing vs.Trad: 8 Key Differences

I could talk for hours about the subtleties that differentiate sport climbing from trad. But instead, I’ll share eight key differences. 

The Discipline Dictates Where You Can Climb 

Due to climbing ethics and rock type, climbing areas typically develop predominately as either an arena for sport climbing or a crag for trad climbing.

In most cases, climbing areas with rock that does not offer much in terms of cracks, pockets, flakes, horns, fissures, and knobs, get bolted and become sport climbing areas.

In comparison, if the rock allows for the placement of reliable traditional protection, and local climbing ethic deems bolts necessary, then the area becomes known as a trad climbing zone.

Sure, nowadays, there is an overlap between the two. But in most cases, your ability to safely climb an area will depend on whether it’s a sport or trad crag and the gear you bring.  

Gear and Preparation

Sport climbing and trad climbing require some of the same gear. For example, climbing ropes, helmets, climbing shoes, and a harness are required for both. 

However, the gear you use to protect the climb is drastically different. Sport climbing relies on quickdraws attached to pre-drilled bolts to protect the climb. On the other hand, trad climbing requires an additional rack of climbing gear to protect the climb adequately. 

Because trad climbing requires more gear, it’s generally understood that preparing for a route is more complex. For sport climbing, you can count the number of bolts and bring the equivalent number of quickdraws. 

Reading the Route

This brings us to the next difference–  reading the route. Reading a sport climb is all about looking for holds and predicting the sequence of movements that will allow you passage. In addition, reading a sport route involves looking for clipping stances and rest positions. 

Reading a trad route is similar. However, one distinct difference is reading the route for protection opportunities. You need to assess the route and imagine where you will get gear. Then, you prepare the rack you plan to use before leaving the ground.

Understanding Where to Place Your Anchor 

Sport climbs, whether single or multi-pitch, have established anchors–usually two bolts with other chains or hardware for clipping in. Some trad routes may have bolted anchors if it’s a particularly “sporty” single-pitch crag or a well-developed multi-pitching area.

But for the most part, trad routes require the climber to construct an anchor using trad gear. Building anchor requires an extra set of knowledge and skill to do safely. For example, understanding where to place the anchor and how to make it bomb-proof.  

Availability to Climb Indoor vs. Outdoor

One reason sport climbing has become so popular since its creation in the 1980s is its accessibility. In particular, because you can sport climb inside. 

Learning how to sport climb and train inside climbing gyms has been an incredible boon for the sport climbing discipline.

In comparison, trad climbing is generally understood as an outdoor sport. Yes, some gyms nowadays have artificial cracks, but those are climbed using a top rope and primarily for practising crack climbing technique and not for placing gear.


A sport climber chalks chalks his their hands and rests during a steep rock climb
Photo Courtesy of Ben Kitching

Your Risk Assessment is Different

Both climbing styles are inherently dangerous and not safe. To perform safely in either climbing discipline, you must assess risk and make critical decisions to mitigate risk. Some of your choices could even be the difference between life and death. 

However, it is generally understood that sport climbing is less risky than trad climbing. This is because strategically placed bolts make the climber less exposed to a big fall.

On the other hand, how exposed a climber is to a significant fall while trad climbing is based on the availability of gear placements, the quality of the natural features of the rock, and their ability to place reliable gear that will catch them. 

Therefore, the risk assessment a climber performs while trad climbing is generally understood to be significantly more complex and nuanced than the decision-making a sport climber performs as they navigate the route.      

Climbing Style Use Different Muscles

The climbing techniques for sport climbing and trad climbing can be very distinct. For example, sport climbing is characterized by face climbing, whereas trad climbing is characterized by crack climbing. Again, there will be an overlap between these two techniques, but the general distinction remains somewhat true.

The pump you get from hard face climbing is different from trad climbing. Crimping on small edges, pulling on pockets, and knee barring in roofs uses different muscles and gives an entire body workout. 

On the other hand, hand-jamming, using off-width technique, foot-jamming, and scaling cracks provide you with a completely different sensation and workout. In this regard, no climbing style is better than the other. They’re just different.  

Impact on the Climbing Environment

Sport climbing permanently alters the climbing environment more than trad climbing. For a sport climb to be safe, it requires drilling holes and equipping the rock with bolts and bolt hangers. Anchors need to be installed at the top of the climb, also.  

In comparison, trad climbers bring and take everything they’ll need when they arrive to do a climb and when they leave. 

Back in the day, this wasn’t always true because trad climbers were hammering in equipment like pitons. But nowadays, since trad gear has dramatically improved, the only thing left behind on a trad route should be chalk.

The reality of trad’s limited impact and the adventurousness of leaving the ground with a finite amount of protective equipment is why trad climbers love the discipline so profoundly.

Rainbow Valley: The Haunting Reality on Mt. Everest’s Slopes

April 8, 2023 by endorfeen

Mount Everest a name that has captivated the world since its recognition as Earth’s tallest peak. Its awe-inspiring beauty and towering height are famous. However, a lesser-known aspect of Everest, often referred to as the “Rainbow Valley,” reveals the mountain’s darker side. This article aims to shed light on this mysterious location, providing essential information for those considering an ascent.

Mt Everest - Rainbow Valley
Mount Everest – Credits: Andreas Gäbler

Though the name “Rainbow Valley” might evoke images of a picturesque landscape, the reality is far different. This region is a haunting graveyard of fallen climbers. It is situated below the northern ridge of Mount Everest at an altitude exceeding 8,000 meters. Countless bodies lie scattered throughout the area, a stark reminder of the mountain’s perils.

Clad in vibrant blue, red, orange, and green jackets, these corpses provide the area with its colourful moniker. Alongside the bodies, multicoloured debris, including tents, cans, and oxygen tanks, contribute to the rainbow-like appearance.

Andreas Breitfuss – Mt Everest Summit | Credits: WorldNavigata

Each year, climbers attempt to conquer the summit. Some succeed, others turn back, and tragically, a few lose their lives. Most of these fatalities occur in Everest’s “death zone” – an area above 8,000 meters. The hostile environment, characterized by thin air, severe weather, and fierce winds, makes survival a constant struggle. The narrow trails in the death zone leave little room for the fallen. The bodies are often pushed aside, finding their final resting place in the Rainbow Valley.

Recovering the deceased from such treacherous terrain is a high-risk endeavour, requiring multiple people and immense effort. As a result, the bodies remain undisturbed, and Rainbow Valley grows increasingly crowded with each passing year.

Gaining a clear understanding of Rainbow Valley on Mt. Everest requires first familiarizing oneself with the concept of the “death zone”

Understanding Altitude Sickness

When going up in altitude, climbers risk experiencing altitude sickness, also known as acute mountain sickness. This condition arises due to insufficient oxygen supply to the brain at high elevations.

As climbers ascend, the barometric pressure of the air decreases, causing oxygen molecules to disperse and resulting in thinner air. This diminished oxygen availability adversely affects the body’s organs. It leads to symptoms such as laboured breathing, difficulty walking, coughing up fluid, disorientation, and even unconsciousness.

In these conditions, blood viscosity increases, dehydration sets in, and the likelihood of a stroke rise. Additionally, altitude sickness can severely impair judgment. Thus, each laborious step taken at high elevations becomes a race against time and the body’s limitations.

What do Climbers call the “Death Zone”?

The death zone on Mt. Everest refers to any mountain area above 8,000 meters (26,247 feet). Over 200 fatalities have occurred within this treacherous zone, earning it the ominous title of the “death zone.”

At such extreme elevations, the oxygen level is dangerously low, with only one-third of the typical concentration at sea level. To mitigate this risk, climbers carry supplementary oxygen tanks during their ascent. Insufficient oxygen supply at these heights can lead to altitude sickness and, in some cases, death.

The trails in the death zone are notoriously narrow and congested, offering little room for the steady stream of climbers. In peak season, queues of climbers can be seen waiting to complete their ascent, as showcased in viral photos. This congestion can force climbers to spend extended periods in the death zone. As a result, it further increases the inherent risks associated with high-altitude mountaineering.

Rainbow Valley is a reminder of the danger

What you can expect of the Rainbow Valley

Rainbow Valley, situated on Mt. Everest, derives its poignant name from the colourful jackets adorning the bodies of climbers who lost their lives on the mountain. The hues of the rainbow – red, green, and blue – are represented by these vibrant down suits, partially concealed by snow.

Many of these fatalities occurred within the notorious Death Zone. If climbers perished along the mountain trail, others were often compelled to move their bodies off the path to clear the way.

The reality of Everest is stark, leaving climbers with little choice but to prioritize their own survival. With the trail being perilously narrow, icy, and treacherous, every moment is a matter of life or death.

When encountering deceased climbers, those still ascending must focus on staying alive. In the Death Zone, where altitude sickness can become debilitating, climbers must also resist the urge to sleep, as succumbing to the cold could prove fatal.

The Deadly Reality of Everest’s Death Zone and the Formation of Mt Everest’s Rainbow Valley

The Death Zone on Mt. Everest, encompassing areas above 8,000 meters (26,247 feet), is notorious for its high number of fatalities. The extremely low oxygen levels in this zone can result in a life-threatening lack of oxygen for climbers, leading to death.

The trail to the summit within the Death Zone is so narrow that it can accommodate only one person at a time. As a result, the bodies of those who perish in this area are pushed into Rainbow Valley, effectively turning it into their final resting place.

Deceased climbers’ bodies are either stepped over or moved off the trail into Rainbow Valley or other locations below the ridge. Chad Gaston, a recent Everest climber, described the challenges of navigating past incapacitated individuals, including one person wrapped like a mummy.

Over 300 climbers have lost their lives in the Death Zone since 1922. In 2015 alone, an avalanche claimed the lives of at least 19 climbers. As the number of casualties continues to rise, Rainbow Valley grows increasingly more colourful with the remains of the fallen.

Why is there an accumulation of deceased climbers in Mt Everest’s Rainbow Valley?

What becomes of the bodies in Rainbow Valley or the Death Zone on Mt. Everest? In most cases, they remain undisturbed indefinitely, as recovery is exceedingly difficult, if not impossible.

Helicopter rescues at such high elevations are not feasible due to the powerful winds, while the extreme weather conditions, narrow trails, and high altitude pose significant challenges for those attempting to recover bodies. It often takes several people to retrieve a single body, a task few are willing to undertake.

The cost of recovering a body can exceed 70,000 USD. Although some bodies have been recovered after paying this hefty sum, the process remains dangerous and can result in additional fatalities.

For instance, in 1984, two Nepalese mountaineers lost their lives while attempting to recover a body from the Death Zone. Even with substantial financial resources, there is no guarantee that a body can be successfully retrieved. Consequently, the Rainbow Valley continues to accumulate the remains of climbers who have perished on Mt. Everest.

What is the main cause of death on the Mount Everest

The majority of fatalities on Mt. Everest occur within the Death Zone, an area above 8,000 meters. This elevation presents numerous challenges, including thin oxygen levels, harsh weather conditions, strong winds, and narrow trails. Even a minor misstep can prove fatal, making each step a matter of life and death.

As of 2022, Everest has been summited by 6,098 different people, for a total of (Approx.) 11,346 summits. till 2022 with c.310 recorded fatalities since 1924. The death rate dropped below 1% in 1980.

A BBC report revealed that the majority of deaths on the mountain were due to avalanches (approximately 30%), while 20% resulted from acute mountain sickness. Falls and exhaustion are other significant factors contributing to fatalities during Everest climbs.

The highest death rate occurred during the 1970-1980s, at 2.2%, but has since decreased.

Some Facts About the Rainbow Valley on Mt Everest

  • Since Tenzing Norgay and Edmund Hillary completed the first verified ascent of Mt. Everest in 1953, the mountain has claimed the lives of over 300 climbers. The vast majority of these fatalities occurred in the Death Zone.
  • Due to the decrease in air pressure at such high elevations, an average person can only breathe in about 30% of the oxygen they typically receive at sea level.
  • Without proper acclimatization, an individual accustomed to sea-level conditions would lose consciousness within two to three minutes in the Everest Death Zone.
  • Given the extreme conditions in the Death Zone, climbers estimate that it can take up to 12 hours to traverse the 1.72km distance between South Col and Everest’s summit.
  • The study “Mortality on Mount Everest” indicates that profound fatigue and delayed summit times are early factors associated with subsequent fatalities.
  • Retinal haemorrhages can affect one in four Everest climbers. Although these typically improve upon descending to lower altitudes, they can still be lethal in the Death Zone.
  • An ABC Catalyst article states that one in 20 climbers who reached Everest’s summit dies while descending to base camp.
  • Most bodies frozen on the mountain are found in the Everest Death Zone.
  • Despite these daunting challenges, climbers have successfully navigated the danger zone and returned from Everest over the years.

Everest Base Camp Stories

Everest Base Camp is the launching point for climbers attempting to summit Mt. Everest. The area is filled with tent settlements of mountaineers, and during peak season, the base camp becomes vibrant with multicoloured tents.

This location acts as the final resting station before climbers begin their ascent. While at the base camp, mountaineers often share songs, experiences, and stories with one another. Many of the tales whispered among climbers at Everest Base Camp revolve around the corpses found in Rainbow Valley.

Among the most famous of these stories are those of Green Boots, Sleeping Beauty, and Hannelore Schmatz.

Green Boots Everest

Green Boots is a well-known story from Everest expeditions, having received significant media attention. The “surname” refers to a deceased climber on the mountain’s northeast ridge.

Green Boots

The body is called Green Boots due to the green boots it wears and the oxygen tanks on its back. It is widely believed that the body belongs to Tsewang Paljor, an Indian climber who went missing during a 1996 ascent.

Two other climbers also perished in the same incident, but their bodies were not found. Green Boots, however, remains in a small cave below the summit.

This body serves as a landmark for Everest climbers. Approximately 80% of them rest in this cave during their ascent. Green Boots is the most visible and well-known corpse in Rainbow Valley.

Sleeping Beauty Everest

Another well-known story is that of Francys Arsentiev, the first American woman to summit Mt. Everest without supplemental oxygen.

The incident occurred on May 22, 1998. Francys and her husband set out on the expedition like any other mountain climb. Her ascent went smoothly, but during the descent, she became disoriented and was stranded on the mountain for three days without supplemental oxygen. A rescue team was eventually dispatched to bring her down.

When the team discovered Francys, she was barely breathing, severely frostbitten, and close to death. They managed to lower her as far as they could, but it became increasingly difficult to continue the descent.

Ultimately, they had no choice but to leave her to die on the slopes of Mt. Everest. Francys was found lying on her back as if asleep, which led to her being nicknamed “Sleeping Beauty.”

Hannelore Schmatz- First women to die on Everest

Hannelore Schmatz, a German mountaineer, holds the unfortunate distinction of being the first woman to perish on the slopes of Mount Everest. In 1979, she and her husband set out to conquer the world’s highest peak. The group successfully reached the summit, but during the descent, Hannelore and American climber Ray Genet fell behind.

Exhausted and unable to continue, they decided to spend the night with one of the Sherpas in Everest’s notorious death zone. A fierce snowstorm struck, and Ray Genet succumbed to hypothermia before daybreak. Hannelore and the Sherpa managed to survive the night, but at an altitude of 8,290 meters, Hannelore collapsed, propped up by her backpack, never to rise again. Her final words were a plea for water.

For years, Hannelore’s corpse remained in the same spot, her open eyes and flowing hair a haunting reminder of the mountain’s perils. Numerous climbers passed her body during their ascents and descents. Tragically, two climbers lost their lives in an attempt to recover her body five years later; their remains were found entangled in ropes on the mountain. A year later, powerful winds swept Hannelore’s body off the ridge. Her story serves as a chilling reminder of the dangers on Mount Everest.

George Mallory

The discovery of George Mallory’s body in 1999, 75 years after his death in 1924, marked a significant moment in Everest’s history. George Mallory, alongside his climbing partner Andrew Irvine, attempted to be the first to summit Mount Everest but disappeared during the expedition. Whether they successfully reached the summit before their demise remains unanswered.

In 1999, during an unusually warm spring, Conrad Anker, a renowned mountaineer, found Mallory’s body while filming a documentary with his team. The identification came from a tag with Mallory’s name sewn into it. Due to the extreme cold, his upper torso, his left arm, and part of his legs were remarkably well-preserved.

The broken leg bone on his body suggests that Mallory had likely fallen or slipped, leaving him incapacitated. Over time, high winds and harsh weather stripped parts of his body of clothing and skin. However, the extreme cold had largely preserved the body in its frozen state.

The fate of Mallory’s climbing partner, Andrew Irvine, remains unknown, as his body has never been found.

Mt Everest Expedition

Indeed, while Mount Everest presents numerous challenges and risks, it remains the ultimate goal for many climbers around the world. The sense of accomplishment that comes from standing at the highest point on Earth is an unparalleled experience, and for many, it’s worth facing the dangers.

With thousands of climbers having successfully summited Mount Everest and a death ratio of under 1%, the peak continues to attract adventurers from across the globe. There are two primary routes to the summit: one from Nepal (the southern route) and one from Tibet (the northern route). The southern route, taken by Tenzing Norgay and Sir Edmund Hillary during their historic 1953 ascent, is the most popular and relatively faster option.

Embarking on an Everest expedition requires prior high-altitude climbing experience, determination, physical stamina, and mental fortitude. The harsh climate and high elevation pose unique challenges that climbers must overcome to achieve their dream of reaching the summit.

So, for those who dare to step out of their comfort zone and tackle the Everest challenge, remember that careful preparation, training, and a strong resolve are essential. Despite the inherent risks, the opportunity to conquer the world’s tallest peak and gaze down upon the Earth from 8,848 meters (29,029 feet) is a once-in-a-lifetime experience that many adventurers dream of accomplishing.

The highest mountains in Ireland for your adventures

April 6, 2023 by Furqan Javed

Truly Ireland is a country renowned for its uniquely stunning landscapes and breathtaking scenery, with its highest mountains equally serving as a testament to its natural beauty. Owing from the rugged slopes of Carrauntoohil to the equally majestic peaks of Slieve Donard, these mountains offer not only a challenging climb but also an opportunity to immerse yourself in the stunning surroundings.

Whether you’re a seasoned mountaineer or a first-time hiker, these peaks are waiting to be conquered, offering a unique adventure and an unforgettable experience.

So, pack your backpack, lace up your boots, and let’s explore the highest mountains in Ireland.

Carrauntoohil

Credits: Elle Leontiev

1,038 meters/3405.512 feet – County Kerry

In the first place, Carrauntoohil is unquestionably Ireland’s highest mountain, located in County Kerry. Furthermore, it’s a popular climb, with stunning views over the surrounding countryside. However, the most popular route is the Devil’s Ladder, which involves a steep ascent through a rocky gully. For more experienced climbers, there is also the Caher Ridge route, which usually offers even more breathtaking views.

Main Fact: Whereas the first recorded climb of Carrauntoohil was in 1808 by an Englishman named Charles Barrington.

Cnoc na Péiste

Credits: @alanb442

988 meters/3241.47 feet – County Kerry

Located near Carrauntoohil, Cnoc na Péiste is another popular mountain for hikers in Ireland. In addition, the name means “the worm’s hill,” and refers to the mountain’s undulating shape. Moreover, the most popular hike is the Bridia Valley route, which offers stunning views over the surrounding mountains.

Main Fact: People say that the mythical Irish warrior, Fionn MacCumhaill, is at home in Cnoc na Péiste.

Mount Brandon

Credits: @entdecke_irland

952 meters/3123.36 feet- County Kerry

Named after Saint Brendan, the patron saint of Kerry, explicitly Mount Brandon is one of the most beautiful mountains in Ireland. Being that, there are several routes to the summit, including the Pilgrim’s Path, which follows an ancient pilgrimage route to the summit.

Main Fact: According to legend, Cú Chulainn, the legendary Irish hero, is also associated with Mount Brandon.

Lugnaquilla

Credits: @schugkai

925 meters/3034.78 feet – County Wicklow

Lugnaquilla is the highest mountain in County Wicklow and, indeed, one of the most popular hikes in the Dublin area. Markedly, the most popular route is the Glen of Imaal route, which offers stunning views over the Wicklow Mountains.

Main Fact: Lugnaquilla is also known as the “Hollow of the Wood,” and is said to be the site of a legendary battle between the ancient Irish hero, Fionn MacCumhaill, and the giant, Cúchulainn.

Galtymore

Credits: @Colin C Murphy

919 meters/3015.09 feet – County Limerick

Located on the border of Tipperary and Limerick, Galtymore is presently the highest mountain in County Tipperary. The most popular route is the Galtybeg-Galtymore Traverse, which significantly offers stunning views over the surrounding countryside.

Main Fact: According to tradition, the legendary Irish heroes, Finn McCool and Diarmuid MacDuibhne, fought a great battle at the site of Galtymore, in general.

Baurtregaum

Credits: @mountains_inside_her

851 meters/2791.99 feet – County Kerry

Baurtregaum is located on the Dingle Peninsula, and so far a popular climb for those looking for stunning views over the coastline. Undeniably, the most popular route is the Caherconree-Baurtregaum Loop, which offers breathtaking views over the surrounding countryside.

Main Fact: To sum up, according to tradition, the ancient Irish hero, Cúchulainn, fought a fierce battle against his enemies at the site of Baurtregaum.

Slieve Donard

Credits: @sean.k3511

850 meters/2788.71 feet – County Down

Located in the Mourne Mountains, Slieve Donard is surely the highest mountain in Northern Ireland. The most popular route is the Glen River route, which offers stunning views over the coast.

Main Fact: In addition, tradition holds that the burial place of Saint Patrick, the patron saint, is at Slieve Donard.

Mullaghcleevaun

Credits: @visitwicklow

849 meters/2785.43 feet – County Wicklow

Though located in the Wicklow Mountains, Mullaghcleevaun is a challenging climb but offers stunning views over the surrounding countryside. Without a doubt, the most popular route is the Glenmacnass Valley route.

Main Fact: Although unverified, legend has it that the ancient Irish hero, Fionn MacCumhaill, fought a legendary battle against the warrior queen, Maeve, at the site of Mullaghcleevaun.

Mangerton Mountain

Credits: @daelyn_hikes

838 meters/2749.34 feet – County Kerry

Mangerton Mountain is located basically in Killarney National Park and offers breathtaking views of the surrounding lakes and mountains. Coupled with the most popular route is the Devil’s Punchbowl route, which takes hikers to the summit through a rocky valley.

Main Fact: It is a popular belief that Mangerton Mountain is the dwelling place of the Irish mythological figure, Diarmuid and Gráinne.

Purple Mountain

Credits: @tiny_hiking_viking

832 meters/2729.66 feet – County Kerry

Notably located near Killarney, Purple Mountain is certainly known for its stunning views of the Lakes of Killarney. At the present time the most popular route is the Purple Mountain-Mangerton Loop.

Main Fact: Legend has it that the ancient Irish hero, Fionn MacCumhaill, and the giant Cúchulainn fought a legendary battle at the site of Purple Mountain, according to evidence.

As we come to the end of our list featuring the ten tallest mountains in Ireland, emphatically the county of Kerry boasts an impressive collection of towering peaks.

Have you ticked any of the above-highest mountains in Ireland off your bucket list until now?

Looking for more?

If you’ve already conquered well-known peaks like Carrauntoohil and Mount Brandon, don’t worry, surprisingly, there are still plenty of other mountains to explore.

In order to help you plan your next adventure, additionally, there is a compiled list of the 180 tallest mountains in Ireland, complete with their heights and locations.

Check out the table below for more information, and get ready to hit the trails!

RankNameElevation
(metres)
Elevation
(feet)
Prominence
(metres)
Prominence
(feet)
1Carrauntoohil103934271038.63427
2Brandon Mountain9523141927.03059
3Lugnaquilla9253053849.02802
4Slieve Donard8502805825.02723
5Galtymore9183029821.02709
6Mweelrea8142686778.02567
7Nephin8062660768.02534
8Mount Leinster7942622726.02396
9Barrclashcame7722548706.02330
10Croaghaun6882270688.02270
11Errigal7512478685.02261
12Binn Bhan7252393682.02251
13Knockmealdown7922615678.02237
14Slieve Carr7212379648.02138
15Slievenamon7212379643.02122
16Baurtregaum8512808642.02119
17Croagh Patrick7642521638.02105
18Binn idir an Da Log7022317629.02076
19Fauscoum7922614628.02072
20Ben Gorm7002310612.02020
21Knockboy7062330610.02013
22Maumtrasna6822251608.02006
23Keeper Hill6942290607.02003
24Cuilcagh6662198605.01997
25Slieve Snaght6152030600.01980
26Purple Mountain8322746593.01957
27Birreencorragh6982303583.01924
28Slievemore6712214582.01921
29Mangerton8382766580.01914
30Sawel6782237580.01914
31Knocknadobar6902277565.01865
32Truskmore6472135560.01848
33Blackstairs Mountain7352426540.01782
34Corranabinnia7142356540.01782
35Croaghgorm6742224522.01723
36Croghan Kinsella6062000520.01716
37Mullaghanattin7732551514.01696
38Stumpa Duloigh7842587494.01630
39Beenoskee8262726492.01624
40Muckish6672201481.01587
41Coomacarrea7722548474.01564
42Musheramore6432121437.01442
43Binn Mhor6612181408.01346
44The Paps East6942290402.01327
45Hungry Hill6852261400.01320
46Slieve Snaght6782237400.01320
47Crohane6562165388.01280
48Knocklomena6412115379.01251
49Mullaghcleevaun8492802373.01231
50Aghla Beg South Top6021988366.01208
51Caherbarnagh6812247364.01201
52Nephin Beg6272069364.01201
53Leenaun Hill6182039359.01185
54Slieve Binnian7462461349.01152
55Keadeen Mountain6532155335.01106
56Knockowen6582171330.01089
57Cnoc na gCapall6392109330.01089
58Binn Bhriocain6672201320.01056
59Dooish6522150319.01053
60Knockshanahullion6522152316.01043
61Slieve Bearnagh7392439304.01003
62Binn Chorr7112346304.01003
63Mullaghaneany6272069302.0997
64Broaghnabinnia7452459299.0987
65Lackabane6031990291.0960
66An Bheann Mhor6752227290.0957
67Knockanaffrin7552492289.0954
68Devilsmother6452129280.0924
69Slievanea NE Top6702211273.0901
70Kippure7572498264.0871
71Mullaghanish6492142264.0871
72Eagle Mountain6382105264.0871
73Cnoc na Peiste9883260254.0838
74Carran6041993240.0792
75Binn Bhraoin6912280234.0772
76Scarr6412115232.0766
77Maulin6212049225.0743
78Corcog6092010223.0736
79An Scraig6232056215.0710
80Croaghanmoira6642191209.0690
81Coomnadiha6442125208.0686
82Tonelagee8172696204.0673
83Djouce7252393203.0670
84Binn Dubh6962297202.0667
85Mullaghclogha6352096202.0667
86Slievelamagan7022317196.0647
87Binn Gabhar6642191194.0640
88Lavagh More6712214193.0637
89Temple Hill7832584188.0620
90Slieve Commedagh7672531184.0607
91Slieve Meelbeg7022316184.0607
92Knocknamanagh6372102180.0594
93Muckanaght6542158179.0591
94Brandon Peak8402772178.0587
95Cnoc na Banoige6412115178.0587
96Cush6412116176.0581
97Knockmoyle6842257168.0554
98Beann7522482166.0548
99Greenane8022647160.0528
100Ben Lugmore8032650158.0521
101Slieve Muck6702212156.0515
102An Chailleach6322086155.0512
103Knocknafallia6682204152.0502
104Silver Hill6001980151.0498
105Colly6792241146.0482
106An Corran6672201142.0469
107Kells Mountain6332089140.0462
108Glennamong6282072139.0459
109Camenabologue7582501136.0449
110Eskatarriff6011982136.0449
111Beenmore6672201132.0436
112Chimney Rock Mountain6562165130.0429
113Caherconree8352756129.0426
114Gravale7182369126.0416
115Binn Doire Chlair6732221122.0403
116Sugarloaf Hill6632187118.0389
117Tonduff6442125118.0389
118Meenteog7152360112.0370
119Coomura Mountain6662198110.0363
120Lobawn6362099110.0363
121Binn Chaonaigh6332089110.0363
122Tievebaun6112016109.0360
123Masatiompan7632518108.0356
124Conavalla7342422108.0356
125Cnoc na hUilleann6062000108.0356
126Caoinkeen6922284106.0350
127The Paps West6902277106.0350
128Moanbane7032320104.0343
129Coumaraglin Mountain6172036103.0340
130Knocknagantee6762231102.0337
131Mullacor6572168102.0337
132Cove Mountain6552161102.0337
133Seefingan7232386101.0333
134Coomcallee6492141101.0333
135Slieve Loughshannagh6172036101.0333
136Lyracappul8252723100.3331
137Caher1000330099.7329
138Slieve Meelmore687226797.0320
139Monabrack630207997.0320
140Cnoc an Bhraca731241296.0317
141Seahan647213693.8310
142Lugduff652215293.0307
143Boughil631208293.0307
144Beenkeragh1008332790.8300
145Mullaghnarakill665219590.0297
146Lavagh Beg650214590.0297
147Meenard Mountain625206390.0297
148Stoompa705232788.0290
149Ben Creggan693228788.0290
150Mullach Glas622205388.0290
151Dart Mountain619204386.0284
152Knocknalougha629207685.0281
153An Cnapan Mor649214281.0267
154Galtybeg799263780.3265
155Ardnageer642211980.0264
156Croaghbane641211578.0257
157Cnoc na Toinne845278977.0254
158Camaderry Mountain699230572.0238
159Ben Creggan South Top687226772.0238
160Beann SW Top657216872.0238
161Carrigvore682225171.0234
162The Big Gun939309970.0231
163Seefin726239670.0231
164War Hill686226469.0228
165Coumfea742244868.0224
166Coomnacronia636209968.0224
167Knockeenatoung601198468.0224
168Mangerton North Top782258166.0218
169Duff Hill720237665.0215
170Tomies Mountain735242662.0205
171Knocknagnauv655216262.0205
172Beann South Top639210962.0205
173Black Hill602198761.0201
174Ben Bury795262460.0198
175Stumpa Duloigh SW Top663218860.0198
176Corranabinnia SW Top681224758.0191
177Cnoc na dTarbh655216258.0191
178Knocknamanagh NE Top625206358.0191
179Macklaun607200356.0185
180Slievemaan759250555.0182

Climbing Carrauntoohil: Ireland’s Highest Mountain

April 4, 2023 by Furqan Javed

Welcome to the Emerald Isle, where the rugged mountains and mystical landscapes beckon the adventurous soul. Carrauntoohil, Ireland’s highest peak, stands at 1,038 meters (3,406 feet) in County Kerry.

However, the climb to the summit is no walk in the park. Despite the challenging climb, the reward of breathtaking views and a sense of accomplishment make it all worthwhile.

About Carrauntoohill, Key Characteristics

credits: Elle Leontiev

Rising from the stunning MacGillycuddy’s Reeks range, Carrauntoohil is the highest mountain in Ireland and a natural wonder worth exploring. Experience awe-inspiring scenery and unforgettable adventure on Carrauntoohil – a magnificent sandstone mountain with glacial corries.

Upon reaching the summit of Carrauntoohil, a remarkable landmark awaits – a large cross erected in 1976. This significant monument holds great spiritual significance for hikers and serves as a powerful reminder of the natural beauty and the importance of preserving it for future generations.

With its unique geological features, spiritual significance, and stunning views of the Irish countryside and the Atlantic Ocean, Carrauntoohil is a destination that is sure to leave a lasting impression on anyone who visits.

Tips for Your Ascent of Carrauntoohil

Carrauntoohil
credits:https://unsplash.com/photos/rLfxmqHlx_U

Are you ready to conquer the towering Carrauntoohil, Ireland‘s highest peak?

Equipment Needed

Are you ready to conquer the towering Carrauntoohil, Ireland’s highest peak? Embarking on your ascent, equip yourself with the right gear for this exhilarating adventure. Stay safe and comfortable during your climb with sturdy boots, warm clothes, waterproofs, and navigation tools. Don’t forget to pack plenty of water and snacks to keep your energy levels up. Additionally, bring a first aid kit, headlamp, and whistle just in case.

Weather

This towering mountain can be dangerous in poor weather conditions, and it’s best to avoid it if you lack experience or if the weather is not good. The ridges and peaks of Carrauntoohil are highly exposed to wind and rain, and poor visibility can increase the risks even more.

The weather can change dramatically and rapidly in this mountain range, especially when severe weather blows in from the Atlantic Ocean. Therefore, you must come prepared with appropriate gear, navigation equipment, and skills. Keep in mind that high winds can strike even when it seems calm at the base of the mountains, and the temperature can drop sharply as you ascend.

With temperatures dropping around 1 degree for every 100m you climb, the peak of Carrauntoohil can be significantly colder than the base.

Preparations

As you embark on your climb, it’s essential to be prepared for the unpredictable weather conditions of the mountain. Check the weather forecast before you set out, and dress accordingly. Be aware of the potential hazards and dangers of the terrain and take necessary precautions. It’s also a good idea to let someone know your plans, including your expected route, time of departure and arrival, and emergency contact information.

Routes and Rewards

As you embark on your climb, you’ll have the chance to choose from several different routes, each with its own unique challenges and rewards. Taking the popular Cronin’s Yard route, the scenic Caher route, or the challenging Howling Ridge route, will treat you to stunning views of the Irish countryside and the majestic MacGillycuddy’s Reeks range.

So get ready for an unforgettable adventure on Carrauntoohil – the mountain that dares you to rise to the top!

Hiking and climbing Carrauntoohil, the different routes

Devil’s Ladder

Imagine standing at the base of Carrauntoohil, feeling the excitement of scaling Ireland’s highest peak. As you survey the routes, the Devil’s Ladder, the most popular but challenging climb up the mountain, draws your eyes.

Starting at Cronin’s Yard, you set off on the Devil’s Ladder route, ready to tackle the demanding ascent ahead. The initial section of the climb involves scaling large boulders, requiring careful foot placement and constant concentration to navigate the uneven terrain.

As you progress, the climb becomes even more strenuous, with steep slopes that will test your stamina and determination.

Despite its popularity, the Devil’s Ladder is not for the faint of heart. It’s not recommended for beginners or those with a fear of heights due to its challenging terrain and steep drops. But for those who are up to the challenge, it’s a truly unforgettable experience that will test your physical and mental limits.

After 4-5 hours of hard work, you reach the summit, your body buzzing with adrenaline and pride. Gazing out at the incredible view of Carrauntoohil, you realize that the Devil’s Ladder has given you an unforgettable experience.

Brother O’Shea’s Gully

A treacherous path for the brave and experienced climbers in the Black Valley’s rugged terrain. Unlike the more mainstream routes, this ascent demands a high level of technical skill and unwavering determination.

Starting at the valley’s peak, fearless climbers embark on a 6-7 hour trek that promises to test their mettle. The trail follows a steep and rocky path, snaking through the valley’s rugged landscape.

As the climbers progress further, the daunting challenge of scaling a sheer gully meets them, requiring the utmost caution and concentration. The ascent requires the use of ropes and other specialized climbing gear, adding a thrilling and heart-pumping element to the climb.

Coomloughra Horseshoe

Charm yourself with the dramatic beauty of Coomloughra Horseshoe’s challenging circular trail, featuring towering peaks like Carrauntoohil. Commencing at Lisleibane, this grueling 6-8 hour trek is not for the faint-hearted, as it requires scrambling over steep ridges and traversing through difficult terrain, demanding a high level of fitness and technical skills.

Challenge yourself and you will receive breathtaking views of valleys, lakes, and cliffs as a reward.Encounter jagged edges, slopes, and vistas as you embark on the Coomloughra Horseshoe journey. Regardless of experience level, the Coomloughra Horseshoe offers an unforgettable adventure that tests limits and leaves lasting memories.

The Caher Trail

The Caher Trail, with its gentle slopes and breathtaking vistas, fulfills the dreams of nature lovers. Beginning at the Hydro Road, the trail offers a peaceful journey for 5-6 hours. Moreover, it can provide relaxation and refreshment for your senses.

Compared to technical routes, the Caher Trail is less challenging. Therefore, it’s ideal for those seeking a more relaxed adventure. As you ascend, stunning views of the majestic mountains that surround you will reward you.

With every step, the power of nature is a reminder as climbers immerse themselves in the rugged terrain. The Caher Trail is an experience that will stay with you long after you have completed it, beckoning you to return and explore its wonders once more.

Stumpa an tSaimh (Hag’s Tooth) Ridge

Nestled in the rugged terrain of the MacGillycuddy’s Reeks mountain range of Ireland lies a true gem for thrill-seeking climbers – the awe-inspiring Stumpa an tSaimh Ridge.

Upon beginning the ascent, climbers immediately face steep and rocky terrain that requires careful footing and a steady hand. The route takes around 6-7 hours to complete, and along the way, climbers will encounter several challenging sections that call for technical climbing skills. However, the rewards for those who persevere are breathtaking views of the surrounding mountains and valleys that stretch as far as the eye can see.

Because of the challenging and often unpredictable conditions, it is adviseable for beginners to seek out more manageable climbs. Climbers must equip themselves with proper gear and be knowledgeable of the potential hazards and dangers of the terrain. Despite the risks, the sense of accomplishment that comes with successfully scaling this impressive ridge is unparalleled, making it a must-do for experience.

How to Get to Carrauntoohil

Carrauntoohil
credits:https://unsplash.com/photos/I4gwXk5RFsU

Your journey begins in the town of Killarney, nestled in the heart of County Kerry. With its charming streets and wonderful scenery, Killarney is the perfect starting point for your adventure. From there, you can either drive or take a bus to the small village of Cronin’s Yard, which is located at the base of Carrauntoohil.

Before setting out, make sure you’re in good physical shape and have experience in mountain climbing. The climb to the summit of Carrauntoohil is not for the faint of heart, but for those who are up for the challenge, it’s a truly unforgettable adventure.

Long-Distance Hikes Around Carrauntoohil

For those looking to make a longer trip of their visit to Carrauntoohil, there are several long-distance hikes that take in the mountain and its surrounding area. One of the most popular is the Kerry Way, a 214-km (133-mile) trail that starts and finishes in Killarney and takes in the stunning scenery of the Iveragh Peninsula, including Carrauntoohil. There are plenty of accommodation options along the way and well-marked trail make it an excellent option for those who want to explore the area at a more leisurely pace.

Another popular long-distance hike that includes Carrauntoohil is the MacGillycuddy’s Reeks Ridge Walk. This challenging 20-km (12-mile) hike takes in several peaks in the mountain range, including Carrauntoohil, and offers spectacular views of the surrounding landscape. Start early and allow for breaks along the way to complete the walk in a day.

Myths About Carrauntoohil

credits: P J K

As with many landmarks around the world, Carrauntoohil has its fair share of myths and legends associated with it. Hiking lover who are up for a challenge should consider taking on this 12 miles epic trek. The hike promises to be an unforgettable experience, with stunning panoramic views of the rugged Irish countryside.

The allure of Carrauntoohil heightens due to the legend of O’Donoghue’s ghost, who reportedly jumped to her death from the summit.

A magnificent mountain, offering a challenging and rewarding climb, whether you believe in myths or not. With amazing views and plenty of opportunities for long-distance hikes, it is a must-visit destination.

How Many Calories Does Rock Climbing Burn?

April 1, 2023 by Teddy Dondanville

Throughout my guiding work, many clients have asked me, “how many calories does rock climbing burn?” Often, I offer a facetious response along the lines of, “enough for pizza and beer after.” My response typically elicits a good laugh, but my clients and I are left curious. So, enough with the jokes– it’s time for science.

Most rock climbing research argues that you can burn upwards of 400 to 900 calories per hour. However, the total number of calories burned depends on the difficulty and duration of the workout, the type of climbing, and individual characteristics related to your basal metabolic rate (BMR).

Keep reading for more details about how many calories rock climbing burns.        

How Many Calories Do You Burn While Rock Climbing?

How many calories you burn while rock climbing depends on the difficulty and duration of the workout and the type of climbing. In addition, personal stats like your BMR, which is roughly calculated based on your weight and height, will affect the calories you burn.

The difficulty and duration of a rock climbing workout are calculated and assigned a value, also known as the Metabolic Equivalent of Task (MET) value. Essentially, the higher the MET value, the harder the activity. Rock climbing has three general MET values.

Estimated MET ValueType of Rock Climbing
8.0Extremely difficult rock climbing, like mountaineering
7.5Difficult rock climbing like hard bouldering or sport climbing  
5.8Easy to moderately rock climbing like traversing or low-intensity trad climbing

One way to estimate how many calories you burn while rock climbing is to multiply your weight in kilograms by the MET value. So if you weigh 84 pounds and go to the gym for a causal top roping session, you may burn upwards of 480 calories. 

Another helpful way to estimate your caloric burn is to multiply the time by the average calories burned for the given activity. So, if rock climbing burns 750 calories per hour and you climb for two hours, then you burn roughly 1,500 calories.   

Other ways to calculate how many calories you burn while rock climbing include using your heart rate to measure caloric burn or calculating your volume of oxygen (VO2) stats. These methods require more tools for data measurement but tend to offer more nuanced results.

Calculating Caloric Burn While Climbing is Imperfect

Ultimately, the methods for estimating how many calories rock climbing burns are imperfect and variable. And I am not a sports scientist. Therefore, the major takeaway is that how many calories climbing burns is different for everyone and depends on various factors like weight, height, difficulty, and duration. 

Therefore, I recommend not getting too caught up with caloric burn. Instead, focus on achieving tangible goals like prolonging your time on the wall, upping your redpoint difficulty, losing weight, improving max hangs, or setting new personal bests in pushups, pull-ups, and other strength-related exercises.   

How To Burn Calories While Rock Climbing: 3 Ways to Climb Stronger

One of my favorite things about rock climbing is that there is always something new to try and weaknesses to improve. Therefore, I can consistently challenge myself to avoid monotonous workouts and stale gym sessions.

Over the course of the year, my climbing regiments change a lot depending on what weaknesses I am targeting and how much climbing and guiding I am doing outside. But three of my favorite workouts that always help me realize gains and send my projects include– 4 x 4 bouldering, ARC training, and campus boarding.

Below I will briefly define and discuss the goals of each type of workout. However, intricate details related to the sports science of each workout and specific recommendations are beyond the scope of this article. Take stock of your current climbing fitness and perform more research to design a workout regimen that suits you.  

The Power Endurance Workout: 4 x 4 Bouldering

Bouldering is a style of rock climbing known for powerful and acrobatic movements that burn lots of calories
Photo Courtesy of Yns Plt

In rock climbing, power endurance is the ability to execute powerful movements over an extended period without getting pumped. Power endurance is an essential ingredient for being able to climb sustained and overhung sport climbs and long boulder problems with a lot of moves.

One of the best ways to improve power endurance is by performing 4 x 4 boulders. A climber doing 4 x 4’s is equivalent to the track runner’s ability to continue sprinting and jumping hurdles with a consistent amount of power. 4 x 4’s train endurance while simultaneously improving your ability to pull and squeeze hard without getting tired.

Explaining 4 x 4’s is the easy part. Doing 4 x 4’s is much harder.

First, select four boulder problems that are well within your physical ability (boulder selection is key to your success, so don’t overdo it). Next, climb each boulder back-to-back with as little rest between efforts as possible. Just enough time for chalking up. Then, after completing all four boulders, rest for four minutes. After your rest, repeat the same set of boulders three more times.

In the end, you will have performed a total of four sets of four boulders, with each set separated by four minutes of resting. This may sound simple, but with the correct selection of difficulty for your ability, it should feel hard enough to challenge you but barely not make you fall.          

The Endurance Workout: ARC Training While Rope Climbing 

A rock climber can great improve endurance and burn a lot of calories by climbing tall rope routes
Photo Courtesy of Jonathan J. Castellon

When you climb long routes using a rope, climbing becomes an endurance sport. You need a certain level of endurance not to get pumped before you reach the top. The best way to train endurance and burn calories is with ARC training.

ARC training stands for aerobic, respiration, and capillarity training. ARC training is the ideal way to build a base level of endurance on which all the rest of your strength compounds.

ARCing consists of climbing rock routes for extended periods, for example, climbing and downclimbing an auto belay for 30 minutes. The route should be well below your physical ability and not make you fall or hang on the rope. The goal is to get pumped and manage the pump without falling.

With ARC training, start small and simple. For example, if you climb 5.11, start with 10 minutes of climbing on a 5.10 with a 10-minute rest. Then progress into longer intervals on the wall with longer rests and more difficult climbs.      

The Contact Strength Workout: Campusing

Campusing is an advanced high-intensity workout well known for burning calories and improving power and power endurance. But it’s most important for enhancing your contact strength.

Campusing occurs on a slightly overhanging campus board with flat edges of varying sizes. Campusing is when the climber performs explosive pull-up movements to ascend the board using only upper body and finger strength.  

In other words, picture a ladder designed only for your fingertips where you cannot use your feet.

Because campus board training is an advanced training tool, it requires moderate strength even to get started. When starting out campusing, use the biggest rungs first, focus on technique, and keep your workouts simple and short.   

  • Previous
  • Page 1
  • Page 2
Social media

Instagram
Pinterest
Facebook
Twitter

Categories

Adventures
Apparatus
Places
Prophets

Information

About us
Contact us

Contributors

Login

Subscribe to the Natural Dispatch, great adventures come to those receiving our news
loader

Copyright © 2023 endorfeen · Privacy Policy · Contact Us

  • Facebook
  • Twitter
  • Instagram
  • English
    • Français (French)