• Skip to main content
  • Skip to header left navigation
  • Skip to header right navigation
  • Skip to site footer
  • Home
    • Adventures
    • Places
    • Prophets
    • Apparatus
    • Sustainability
  • Explore
    • Your next adventure
    • Your guides
endorfeen

endorfeen

The Media For Sustainable Outdoors.

  • About us
  • Write/ share
  • endorfeen – instagram page
  • enforfeen Facebook page
  • endorfeen twitter page
  • Pinterest

Archives for September 2022

The best of Norrona’s Lyngen collection

September 20, 2022 by Ryan Colley

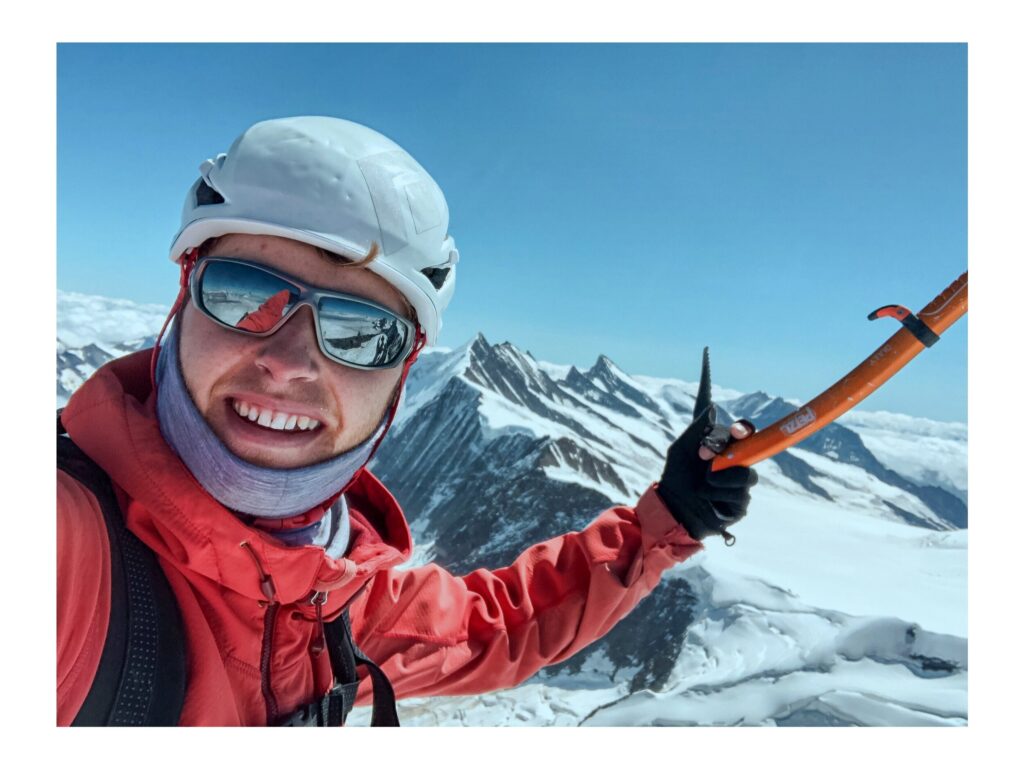
My 21/22 season kicked off with the usual resort skiing, ski touring, and ice climbing, before embarking on two more extensive trips: an expedition to the Caucuses, and a 26-day traverse of the Swiss Alps. The traverse in particular was different from anything I had tried before. I knew I was going to need the right clothing for the job. Norrona’s ski touring lineup – the Lyngen Collection – turned out to be the perfect match.

What is the Lyngen Collection:

  • Gortex Shell Jacket
  • Gortex Pro Shell Pants
  • 850 Down Jacket
  • Thermo Dri 60 PrimaLoft Jacket
  • Alpha 100 hoodie
  • Hiloflex 100 Softshell hoodie
  • Alpha 90 Thermal Fleece
  • Alpha Vest
  • 850 down Shorts
  • Leather glove
  • Dri1 Waterproof glove
  • Down Mitten

I found the entire collection well thought out. You can tell the team at Norrona spent a lot of time balancing weight, with durability and practicality. Whether in arctic winds or under the baking sun, this collection is designed to ski up and over mountains, all season long, and is jam-packed with small features that make a big difference when on the move. Almost all of the fabric used in the Lyngen is recycled, including the Gortex!

Here are a few of my favourite pieces from Norrona’s Lyngen Collection.

Norrona Lyngen collection

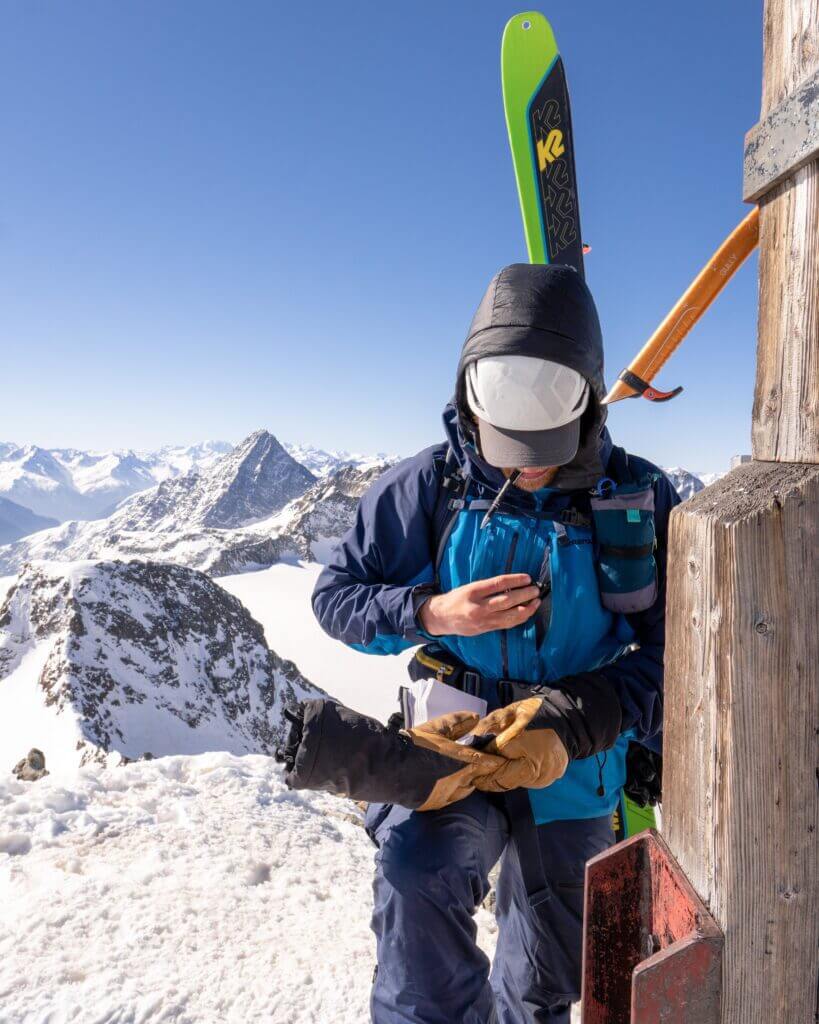
Lyngen Gortex Shell Jacket

A shell jacket is arguably the most important layer in the mountains. Feeling the material of the Lyngen, I admit I was a little apprehensive about having it as my primary shell on such a big trip. It is not often something so light and thin is durable enough to withstand the abuse ski touring and mountaineering can throw its way. However, after a busy season, there are virtually no signs of wear on the outside and just a little bit of rub from my pack’s hip belt.

Normally, I wear a softshell and keep my Gortex layer in my pack until I really need it. But this spring was hot, and I ended up in this jacket a lot (I prefer to tour with a hoodie for sun-pro). On these hot days, I found the ventilation system really valuable. In addition to the armpit vents, it also has a chest vent which doubles as a quick skin or glove stow. I never had issues with waterproofness in rain or snow.

The jacket is mostly made from Gortex Active with Gortex Pro around the shoulders, sleeves and collar.

Norrona Lyngen collection

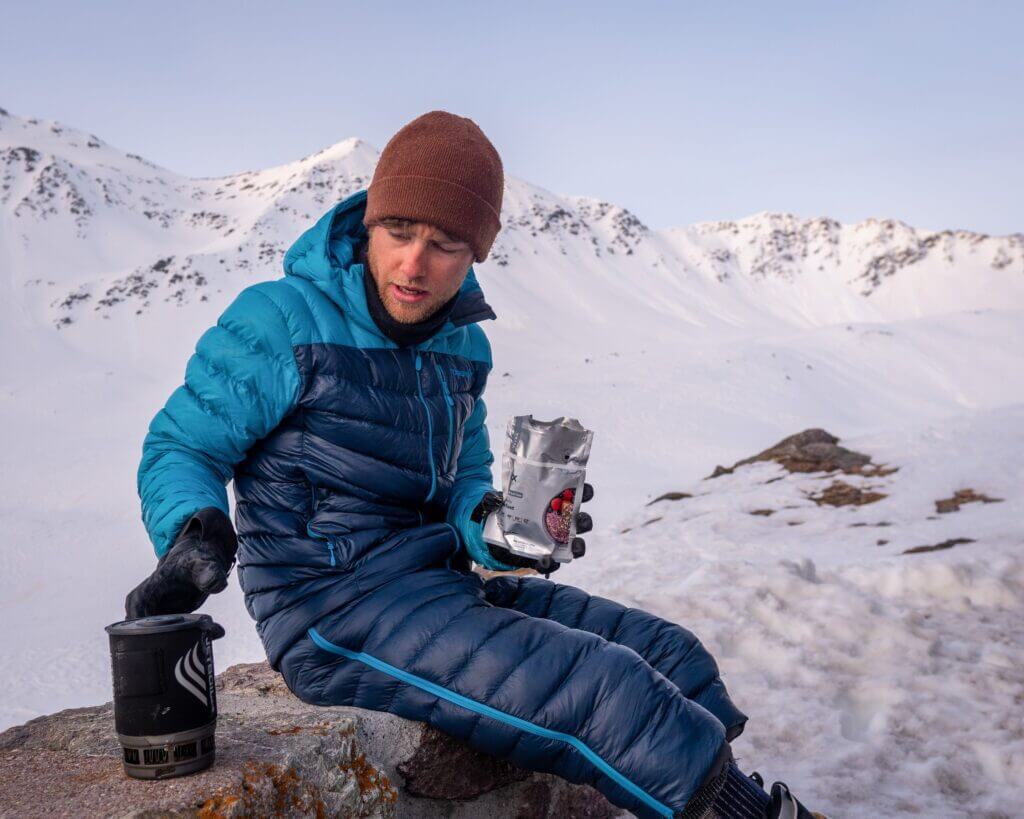
Lyngen 850 Down Jacket

For the past month, this puffer jacket has been my home away from home. I have a soft spot for big, puffy down jackets, and after all of the windy summits, freezing nights, and sunset rides I have grown attached to this reliably warm feather bomb.

At 380 grams and taking up little room when packed, I was surprised by how warm this thing is. It packs a punch. But the material is very thin so watch out around stoves, rocks, prickle bushes!

Norrona Lyngen collection in action

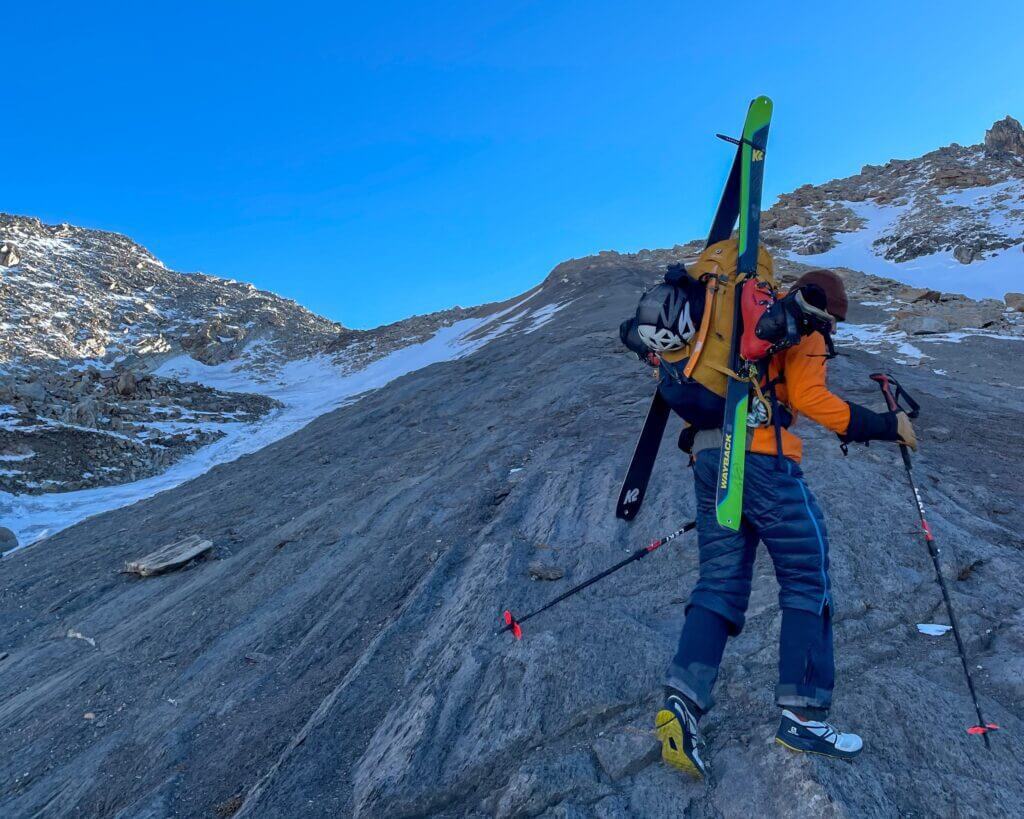
Lyngen 850 Down Shorts

And the award for the most underrated piece of gear this winter goes too… Down shorts! Total game-changers. The best thing that you never knew you needed. They are the answer for those cold mornings in early spring when you don’t want to wear thermal pants because you know it will be hot in the afternoon, but don’t want to have to tough out 3 hours of cold legs before that. These bad boys have a full-length zip, making them easy to get on and off over ski boots or crampons. No, cold legs won’t kill you, but these shorts sure make life a little more comfortable out there.

by night

Thermo 60 Primaloft Jacket

An important piece for any multiday adventure weather is a PrimaLoft or synthetic insulation jacket. Down is warmer but becomes useless when wet, whereas synthetic can hold its insulation properties. The Lyngen version of Thermo 60 jackets has Norrona’s own Dri2 waterproofing for the Lyngen collection. Making it a great choice for a storm shell. This was the layer I wore the most over the traverse and I purposely got it in black so I didn’t mind getting it a little dirty while being so far from a washing machine!

How To Choose the Best Climbing Harness – guide

September 13, 2022 by Louis Udeani

To beginners in the climbing business, every climbing harness might look the same, but if you don’t understand how to choose the perfect harness, you might end up regretting that choice. Choosing the right gear is, without debate, very crucial in ensuring your preparedness and safety and ultimately needed to enjoy the exhilarating experience the adventure gives you.

So for those new ones, don’t worry! You’ll find all the answers to your questions about the climbing harness. In this article, you’ll know;

  • What a climbing harness is
  • The different types of climbing harnesses
  • How to choose the correct harness for your preferred practice
  • Other types of harnesses worth mentioning
  • How to test a climbing harness’s size and comfortability
  • Whether harnesses have weight limits
  • The difference between a rock climbing harness and a tree climbing harness, and
  • When to replace your climbing harness

What is a climbing harness? What are the types of climbing harnesses?

A climbing harness is a device made with strong webbing that typically has a padded waist belt and two leg loops connected at the front and back of the body. It is used to secure a climber to a rope. Below is an image of a typical climbing harness;

image of a climbing harness
Source: Climbing Technology
image of a man wearing a climbing harness
Credit: Ladanifer

Climbing harnesses consist of the following parts:

labelled diagram of a climbing harness
Source: Moosejaw
  1. Waistbelt – This is the wide opening at the top of the harness tightened above the waist to fasten the harness firmly to the climber.
  2. Leg loops – They disperse the climber’s weight and ensure comfort while hanging from the harness.
  3. Belay loop – It’s a robust loop at the front of the harness where the climber attaches the carabiner and belay device.
  4. Tie-in loops – These are the openings to which the belay loop is affixed. Climbers run their ropes through both of these openings when they are ready to climb.
  5. Risers – These straps adjust the distance between the leg loops and waistbelt.
  6. Gear loops – These loops only hold the climber’s gear, such as cams, quickdraws, stoppers, etc.
  7. Buckle – This is used to fasten your waistbelt firmly to your body frame.

Types of climbing harnesses

If you walk into a climbing gear store to buy a harness, you’ll see many types there. So it’s best to get acquainted with the different types and when they are used to save yourself some precious time.

The first thing you need to know is that in the climbing/mountaineering business, there is only one harness of interest: the sit harness. They are carefully designed for rock climbing, especially for long periods of suspension. While wearing it, the climber can rest in a sitting position while hanging from a climbing rope.

How to choose the right harness for your practice

Because the sit harness is the only harness of interest and climbing has several disciplines, it comes with various features to fit any climber’s preferred practice (or domain).

Sit harness for Sports Climbing

In sports climbing, the sit harness should have the following features;

  • Very lightweight – For fast, ultralight movement.
  • Few gear loops (about two) – Since minimal gear is required.
  • Less padding – Since the climber doesn’t usually sit for long periods of time.
sit harness for sports climbing
Sit harness for sports climbing. Source: Black Diamond

Sit harness for Multipitch routes

In multi-pitch routes, the climber is on the wall for a significantly longer period of time and would need more storage options for things like setting up belay stations. For this practice, the sit harness should have the following features;

  • More gear loops (at least four) – Since the climb is more complex, more gear is naturally required.
  • More padding – Not necessary but essential because of more extended periods of suspension.

Sit harness for Big walls

During big wall climbs, a lot of gear is hauled up the wall, and the climbers spend a lot of time belaying. For this practice, your sit harness should have the following features;

  • Soft padding – Necessary for lengthy periods of suspension and belaying.
  • Haul loop – For carrying a second rope.
  • Wide leg loops – To withstand a lot of strain.
sit harness for big wall climbing
Sit harness for big wall climbing. Source: Black Diamond

Sit harness for Via Ferrata

Via Ferrata, climbers need to move freely, like in sports climbing. Your sit harness should have the following features;

  • Lightweight design – For full-range motion and ease of movement.
  • Less padding – You don’t usually sit in the harness via Ferrata, so thick paddings are unnecessary.

Sit harness for Mountaineering or ski tours

These harnesses are not designed for lengthy periods of suspension, so they are not padded. For mountaineering or ski tours, your sit harness should have the following features;

  • Ultralight design – They are very foldable to fit inside backpacks.
  • Removable – They can easily be removed without taking off your crampons or skis.
  • Wide leg loops – So you can wear thicker clothes.
sit harness for ski mountaineering
Sit harness for mountaineering or ski tours. Source: Blue Ice

Sit harness for canyoneering

These harnesses are made explicitly for canyoneering and are suited for intensive use. Their key features include;

  • Integrated protective seat – Protects your wetsuit and harness webbing from abrasion.
  • Reinforced gear loops – For carrying heavier gear.
sit harness for canyoneering
Sit harness for canyoneering. Source: Petzl

Other harnesses worth mentioning

  1. Chest harnesses: This harness is worn around the shoulders and is always used together with a sit harness. It’s designed to provide additional support and relief for the body’s core while on suspension. It’s usually used when a climber has a heavy load or is injured.
image of a chest harness
Chest harness. Source: Black Diamond
  1. Full-body harnesses: This is the combination of the sit and chest harnesses to form one harness.
Image of a full-body harness
Full-body harness. Source: Bergfreunde
  1. Small body harnesses are very similar to adult harnesses but are designed for children.
image of a small body harness
Small body harness. Source: Edelrid

How to try a climbing harness

Now that you know the various types of harnesses and when/where they are used, you can easily select which type would be best for you and test it for size and comfortability (N.B., the following steps apply to the sit harness).

How to wear a climbing harness

To put on a climbing harness, follow these simple steps;

  1. Loosen the leg loops (if adjustable) and waistbelt straps.
  2. Step into the harness. The leg loops should not cross, the belay loop should be at your front and not twisted, and the waistbelt should not be upside down.
  3. Tighten the waistbelt securely right above your hips.
  4. Allowable slippage between your waist and the harness is 20mm (2–finger gap).
  5. Make sure the buckle is doubled back (not necessary for auto double–back models).
  6. Adjust the leg loops (if adjustable). Some are elastic.
  7. Situating the leg loops close to the groin usually works best for prolonged hang times.
  8. Finally, ensure the buckles on each leg loop are doubled back.

How to test the size of a climbing harness

To test if a harness is a perfect fit for you, there are two significant parts to check — the waistbelt and the leg loops. If you are new to climbing, it’s advisable to ask a climbing assistant to guide you through the following steps;

The waistbelt

  • Put on the harness. Adjust the waistbelt to the maximum limit. Consider trying a different harness if it still digs in too hard on your skin.
  • The waistbelt should not move or shift excessively. If it does, tighten it until it stops.
  • You can also test the waistbelt for slippage by trying to pull it down over your hips or slowly inverting yourself while hanging from a rope. The waistbelt should not be able to slip over your hips.

The leg loops

You should be able to slip your hand between your leg and the leg loop.

How to check for comfort

Many climbing gear stores have harness testing stations or rock walls that test whether any harness is a perfect fit for a climber. We strongly advise that you go to a store with one so you can take all the necessary steps to pick the correct harness. To test a climbing harness for its comfortability;

  1. When you hang from a harness, you should be able to sit upright in a relatively comfortable position, similar to a chair. However, you shouldn’t use too much of your core to maintain an upright position.
  2. You’ll want to adjust the risers if it proves too challenging to keep your body upright.
  3. Shorten the risers to help you sit upright with more ease while hanging.
  4. If the risers don’t help, consider trying a different harness.

Some other frequent questions about climbing harnesses

Do climbing harnesses have weight limits?

Yes, they most certainly do. And the limit is far greater than the heaviest human weights. For example, climbing harnesses that are CEN or UIAA certified have a weight limit of 3372.13 pounds which is about 20 times the average weight of a full-grown adult.

What is the difference between rock climbing and tree climbing harness?

A rock climbing harness is not the same as that of tree climbing. Tree-climbing harnesses differ from rock climbing harnesses in the following ways;

  • They have thicker padding and softer material than most rock climbing harnesses.
  • The tree climbing harness generally doesn’t have adjustable loops. They are designed to be more fitted and sleek. This makes them very comfortable and suitable for climbing trees.

When do I need to replace my climbing harness?

There are three main factors to consider when deciding if you should replace your climbing harness.

Change in body size

If your body size changes significantly, your harness will fit differently. Then you’d start to feel discomfort every time you use it. If this discomfort becomes unbearable for you, then it’s time you replace your harness.

How old the harness is

The average lifespan of a climbing harness for most brands is ten years from its manufacture date or five years after its first use. But if you’re a climbing professional, i.e. you climb full time, then it’s best you retire your harness as early as one year after its first use, even if there is no visible sign of damage.

Signs of excessive wear and tear

If your harness shows any signs of excessive tears, fraying, damage to the belay loop or structural webbing of the harness, then retire it IMMEDIATELY.

Baltoro Clean Up Expedition

September 6, 2022 by Karrar Haidri

Over 70km long, the Baltoro glacier is the jewel of the Karakoram. It is situated about 120km Northeast of Skardu and is the longest glacier outside the polar regions. During more than seven days of the trek on the river of ice passes, you can see four peaks rising above 8000 metres. They include K2, Broad Peak, Gasherbrum and many other high and challenging peaks. A large number of mountaineers and trekkers visit the area each year.

Baltoro Clean-up Expedition 2008

In 2008, over 95 mountaineering expeditions and about 5000 trekkers walked the Baltoro glacier. Every year expeditions and trekking parties on the Baltoro glacier create a large amount of pollution.

Visitors to the area are reporting increased deposits of garbage and human body waste lying on these glacier camps, which, besides seriously damaging the local ecology, are becoming a hazard to the visitors’ health.

Due to this emergency, the Alpine Club of Pakistan launched a Baltoro Clean Up Expedition in collaboration with K2-CNR, Italy. During this cleanup operation members, Alpine Club of Pakistan deployed a large number of local porters to collect all burnable and non-burnable garbage, including packing tins, cartons, polythene bags, foodstuff etc., and carry it out of the area for its correct disposal below Askole – the last village en route to Baltoro glacier. From Askole, the Jeeps moved Garbage to Skardu and finally handed it over to Skardu Municipal Authority.

Request to Mountaineers and Trekkers

Now the season of Mountaineering and Trekking is very near.

Mountaineers and trekkers should leave the area clean as they found it. They should not wait until the last minute. Waste processing is encouraged right from the start. Digging latrine pits is a common practice, but an appropriate location needs to be allocated away from the main camping site and running streams.

Visitors should burn paper, while they should retrieve plastic, tins, metal, glass and bags as they do not degrade. Lack of sanitation can result in the spread of dangerous diseases. Also, one should not dispose of waste in crevasses and river water. Carrying lime to sprinkle in the pit can surely dampen the stench. Human body waste can take a very long time to decompose, and any bio-waste, if frozen, can take centuries to decompose. All members should complete the burning process by the evening before their next-day journey.

The practice of burning plastics is still being followed on the campsites. This causes toxic chemicals to be emitted into the air. These toxic chemicals remain in the air and destroy the ozone layer. There is no natural process that can effectively remove the toxic chemicals from the air, which remain there, causing further damage. We encourage the campers that they should instruct their porters to remove the plastics instead of burning them and dispose of them properly.

Meeting the Eiger – The Mitelegi Integral

September 1, 2022 by Ryan Colley

Three days ago, I sat alone beneath the most famous piece of rock and ice in European climbing history – the Eiger. Few mountains hold such a reputation as the Eiger. A deep history, rich with tales of death and glory, has shrouded the peak in mystery amongst the public; and allure among climbers.

The Eiger, a mountain with a reputation

Remarkably, its fame had even reached me as a fourteen-year-old boy living in a small coal-mining town down on the other side of the world. Sifting through a dusty collection of my grandad’s old war books, I came across “The Beckoning Silence” – a book by British climber Joe Simpson, recounting his adventures on the mountain. It’s possible the very pages of this book, full of trepidation and excitement, sparked my motivation to venture into the craggy peaks of New Zealand five years later.

Arriving in Europe, I wasn’t bothered by the busy streets of Paris, the white sands of Greece, or the ruins of Rome. My plane landed. I collected my bags and travelled directly into the mountains, where I have since remained.

Two years and a blur of summits later, something was nagging that remained high on my itinerary: to meet the famous Eiger.

The Berner Trilogy: Eiger, Mönch, and Jungfrau.

En route for the Eiger: the Mitellegi

The obvious choice for alpinists is the classic North Face. But, unfortunately, it wasn’t in condition last season, and now that it was summer and I was alone, it wasn’t an option.

I checked out the easier Mitellegi. The East Ridge is much easier and still a classic of the Alps. It looked like an excellent solo trip.

Studying the topo, I couldn’t help but notice the ridge began another two kilometres from where the route started. After a quick google search, I found the Mittellegi Integral, a longer and slightly more difficult start to the tour. The entire East Ridge is four kilometres of an exposed ridge and steep gendarme scrambling. Now we’re are talking!

As for the descent, the South ridge down to the Eismeer is most common. At 3000 meters, the Eismeer is the second-highest train station in Europe. Tunnelling through the Eiger and back to Grindelwald is an impressive engineering feat, especially for 1905. But sitting on a train isn’t the most inspiring way to finish an alpine climb. The descent is half of the adventure, to cut that out is giving up a big piece of the experience.

Already attempting the complete East ridge, I figured why not go up and over? The somewhat forgotten West Ridge looked steep but straightforward. It follows a loose, broad flank for about 2000 meters to the Alp below.

A traverse of the Eiger, I was intrigued. There was enough uncertainty and aesthetic to make it an appropriate first meeting with the mountain I had heard so much about.

The first ascent team in 1938 (photo from Süddeutsche Zeitung)

For the last two summers, I have been working at a Käserei in the small village of Engelberg. Making cheese in Switzerland, how cliche. However, while working for Walter, a local Swiss cheesemaker, I’ve learnt that making cheese is not quite as idyllic as I might have assumed. After a physical day making cheddar, I was looking forward to resting on the train while passing through the quaint villages and Swiss countryside on my way to Grindelwald.

The Eiger was shrouded in clouds when I arrived. I walked around Grindelwald gathering last-minute necessities, stealing a glimpse of the legendary face every so often.

I bivvied on Alpigen, an alp below the North Face. It was only another three hours from here to a small hut below Ostegg, but I preferred to save all of the climbing for the following day. However, it took me unusually long to go to sleep that night. I had a horrible feeling I was missing something. Could there be a flaw in my plan, but because I was alone, there was no one to tell me so?

The best view I got of the Eiger from Grindlewald. Ostegg on the left and Mittlegi ridge on the right. Summit behind clouds.

First part:

I woke up before my alarm. I felt well-rested, so at 2 am, I flicked on the stove and started preparing my pack. Adding together all of the route timings gave me over 20 hours of nonstop travel, putting me on the summit around 7 pm. Figuring I was descending the west ridge in the dark, I packed an extra puffy and the stove and set off, leaving behind my anxiety from the night before and looking forward to what the day would bring.

Soon I was at the Ostegg hut. Thick morning fog hung in the beam of my headtorch, making it hard to see more than a few meters. It rained on and off. Following my nose through the mist, I passed the occasional cairn as I clambered over scree and around bluffs. Eventually, I took a wrong turn and ended up in a loose gully. Climbing the cold, slimy walls in the dark felt like crawling through a sewer pipe. Then, I became aware of a weird noise growing from a hole in the corner. I continued up until suddenly, a giant bird burst from the crack! Flapping around like a drunken pigeon, it gave me such a fright that I nearly jumped from the gully. After it flew away, I carried on towards the main ridge, my laughter echoing off the walls.

Once I reached the ridge, I was above the clouds. The sun was creeping toward the horizon, and the bitter dark of night slowly surrendered to the cool blues and purples of dawn. There was a light breeze. It pierced through my skin, damp from sweat and rain whenever I stopped moving.

I could see a distinct hole in the mountain ahead of me. It was the so-called letterbox – a short cave tunnelling through to the other side of the ridge.

On my stomach, I pushed my pack ahead of me and wiggled through the hole. There was a short traverse to the base of a corner above the collapsing Ishmeer glacier. I studied the corner and slipped my rock shoes on before attaching my haul line to the rucksack. Just before leaving the ground, I noticed something a little down the face. It looked like a piece of sling from an axe or a pole. I scrambled down to investigate. Sure enough, it was a Black Diamond carbon fibre pole, precisely the model I had been holding off buying. Someone must have dropped it on the crux and figured it had fallen hundreds of meters to the glacier below. I stashed it in my bag, thinking it might come in handy later.

Eiger - Low clouds creeping up the ridge.
Low clouds creeping up the ridge.

I started up the first pitch, moving with care and testing each hold as I went. There is a method, a sort of conversation that takes place when climbing with so much attentiveness. I question every obscure rock with a tap of the foot or hand, waiting for a reply. Movement? Are you a friend or a foe? Slowly I weight each hold, watching for any sign of weakness, backed up by another three points on rock, all of which have undergone the same procedure.

Reaching an anchor, I hauled up my rucksack and decided to wear it as the climbing was not so severe, and the rock was already dry from the morning’s rain. After the corner, I stuffed my rock shoes in the bottom of my pack and put my boots back on. I debated bringing climbing shoes, but I was glad to have them. The climbing would have been okay in boots, but the extra security was worth the weight.

I peeked around the corner and caught a striking glimpse of the Eiger in front of me. Clouds streamed from the craggy, ice summit; a long, jagged ridge climbed up to two steep towers which, from this angle, looked unpassable. It was my first time seeing the Eiger in full. I was curious and eager to have a closer look.

This next section flew by. I wasn’t moving fast, quite the contrary. To experience more, I kept reminding myself to slow down. I took time to draw lines up nearby peaks, to admire the finesse of a young Gamshee as he made his way across a rocky traverse, and I felt how my body naturally moved up each step and compression in the ridge. I felt totally in tune with my surroundings and body. It was incredible.

Partway up the 5a corner. Impressive active ice fall below.

Second half:

I reached the Mittellegi hut at 9.45 am and was welcomed inside by Mirjam, the warden, who returned to drying a few leftover glasses from breakfast.

Fumbling along with the little German I could manage, I tried to buy some water. She explained there were no eftpos but offered me some leftover tea from breakfast. I was very grateful and filled up my Nalgene while we talked about her work as the hut warden and some of her friends that lived in New Zealand.

After the friendly encounter, I carried on for a few minutes. Then, with my warm tea and some fresh cheddar from work, I enjoyed a rest and studied the route ahead.

After the hut, the regular Mittellegi route starts. I followed the telltale scars from years of crampon use over and around the gendarmes and protruding rock that make up the ridge. Finally, after two hours of pleasant scrambling and fixed-rope jugging, I was at the icy summit ridge. I strapped on my crampons and took a small break at the top, taking some photos and admiring the peaks of the Berner Oberland, standing above the valley cloud, like bright, serrated islands.

Often, I’m left wanting more out of a climb, wishing it was a little harder or longer. But as I walked down the valley, saying hello to happy swiss cows and the occasional trail runner, I felt content with the day and pleased with my effort.

Glancing at my watch, my walk to the last train was brisk, then a jog, and finally a sprint to get the last train home! I had a short stop in a kiosk and grabbed an armful of sweets and ice cream, which I inhaled in minutes. As the train went around a bend, I saw the Eiger once again engulfed in its shield of clouds. I smiled and rested my head against the window, drifting off to sleep.

Eiger - Summit
Social media

Instagram
Pinterest
Facebook
Twitter

Categories

Adventures
Apparatus
Places
Prophets

Information

About us
Contact us

Contributors

Login

Subscribe to the Natural Dispatch, great adventures come to those receiving our news
loader

Copyright © 2023 endorfeen · Privacy Policy · Contact Us

  • Facebook
  • Twitter
  • Instagram
  • English